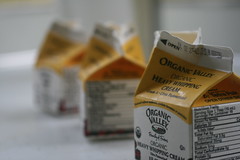
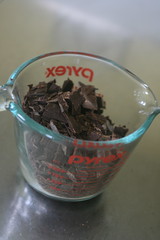
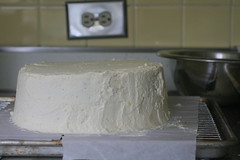
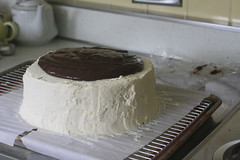
Showing posts with label dessert. Show all posts

Wednesday, September 25, 2013

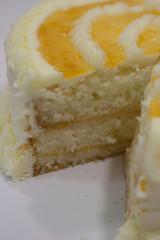
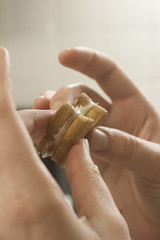
Citrus Bars


I've been using tasty treats as a way to leave an impression on people for 6 or so years now. In high school, I baked when I was stressed or bored or just wanted something productive to do, which lead to my fellow yearbook staff members remembering for my cookies. My freshman year of college, I was known as the floor baker, and even made a Facebook group to notify the people on my floor whenever I made something new that I wanted to share. However, moving off campus and having my own kitchen (well, an apartment three of us shared with a kitchen) somehow meant the end of baking for me, and the oven saw more casseroles and frozen fries than scratch made treats. During my senior toast, I ran into someone I hadn't spoken to since that first year in the dorms, and he asked me if I was still baking delicious treats. I was ashamed to say it'd been a while.

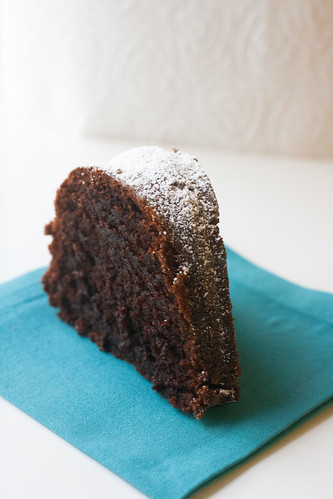
However, recently, that's changed. In the past two weeks, I've baked more than I had in the previous year. Finding inspiration from Keri, I made a chocolate cake for my aunt's birthday, followed by a rosewater cheesecake while visiting my grandparents.

But then, my aunt and I came back after our visit up north and the reality of kind-of-sort-of moving to Tehran began to set in. I can count the number of people close to my age that I know without raising a single finger. Sure, I've met people the numerous times I've visited, but most of the time I'm terrible with names and only okay with faces. Plus, even if I did remember anyone, it's been seven years since I'd spent any significant amount of time in this city. Of course, the only reasonable solution to this "finding friends" thing was for my aunt to throw me a party, a small get together of sorts. With 20 people. So, while my aunt planned the menu, I asked how I could help, and then realized the only reasonable thing to do would be to make some sort of tasty treats. So I did - citrus bars and rosewater cupcakes. And then I washed up nicely, did my make-up ("You should put some blush on." "I am wearing blush."), pulled on a dress, slipped on some heels, and then did my best to not seem too awkward or shy.

Which, when bombarded with 15 new names and faces, can be a bit difficult. And, of course, everyone knows my name. And that I'm the American niece. And, by the end of it, that I'm quiet and shy. At least, I hope that's what they thought and not that I was rude and stuck up. But from their comments, what I am sure of is that they think I make awesome citrus bars. So, I'd say I'm back on track for winning people over with sweets.

Not that I can even take credit for the deliciousness, really, since the recipe for Grape Fruit Bars was delivered to my e-mail from the ever-wonderful Keri with the note "I'm giving you this because the citrus fruit can easily be switched out... my lab says this is their favourite and I got so many e-mails asking for the recipe." So, without further ado (though I suppose that's what scrolling is for), here they are.

Citrus Bars
Recipe from Keri
Makes 36 triangles

For crust:
2 cup plain flour
1/2 cup confectioner's sugar
250 g butter, room temperature

Filling:
4 eggs
2 cups granulated sugar
1/2 cup fresh citrus fruit of choice
1/2 teaspoon baking powder
1/4 cup flour  

Preheat oven to 350F/175C/Gas 4 and line a 9x13 pan with baking paper.

Combine flour,  icing sugar, and butter and mix with a fork or hands until it becomes a thick, crumbly dough. Press dough into the prepared pan so it's even across the bottom. Bake for 20 minutes, or until just golden around the edges. (If pan is dark, check sooner or bake at lower temperature.)

While the base cooks, whisk together eggs, sugar, and juice until smooth.  Then whisk in baking powder, making sure no lumps remain. Finally, whisk in flour.

Pour the egg mixture onto the base. Return to the oven and bake for another 30 minutes or the filling no longer jiggles and is dry to the touch. 

Once cooled, remove from pan, use a sharp knife and cut into pieces of desired size. 

If you're planning on serving them the next day, the paranoid food safety person in me suggests keeping them in the fridge and letting them return to room temperature before eating.

Monday, September 16, 2013

A Floral Cheesecake


My friend Keri has been chronicling her adventures in baking over at  http://bakewithkeri.tumblr.com/. Like most websites, I don't have ready access to it, and after hearing about her rose and coconut cheesecake from her flatmate, and my grandfather teasing me to make something else after making a coconut and chocolate cake for my aunt's birthday (recipe also courtesy of Keri), I figured I'd asked her for the recipe and give it a try. 

And then couldn't find half the things necessary. However, I didn't actually look very hard for them. But I made some substitutions (visible below) and ended up with a tasty cheesecake. It definitely didn't turn out as pretty as Keri's, and may or may not have been as heavenly, but it's definitely simple enough and tasty enough to garner making again. 

I also used just a bowl, wooden spoon, and whisk to make this and found that to be fine, but I left Keri's directions for beating the cheese in place. 


Rose and Coconut Cheese Cake

Base Ingredients 
- 220 g biscuits (I used coconut ones)
- 50 g shredded coconut
- 100 g butter, melted

Directions
1) Break up biscuits somehow. Either use the double baggied and rolling pin method, or, my preferred method: a deep bowl and a meat mallet.
2) Mix  coconut and melted butter into biscuit crumbs. 
3) Press into bottom and 3 cm up sides of a greased 23 cm spring pan. Leave in the fridge for 30 minutes
to set.

Filling Ingredients 
- 500 g cream cheese
- 200 ml coconut milk (from a can)
- 2 Tablespoons sugar
- 2 eggs
- 3 Tablespoons rosewater (adjust to taste)

Directions 
1) Preheat the oven to 170 C (325 F). 
2) Beat the cream cheese with an electric
beater. Add the coconut milk in two lots of 100 ml and beat
well to get rid of any lumps. Best in the sugar, followed by the eggs one at a time. 
Stir in the rosewater. 
3) Pour filling mixture into prepared base. Bake for 45 minutes at 325F, or until it isn't jiggly. After which, turn off the oven and leave cake in for an additional hour.
4) Let cheesecake cool on the counter for 30
minutes or until it's cool enough to place in fridge. Chill 4 hour or overnight.
5) Run knife around edge before releasing from pan. 

Saturday, April 14, 2012

The Limes are the Key

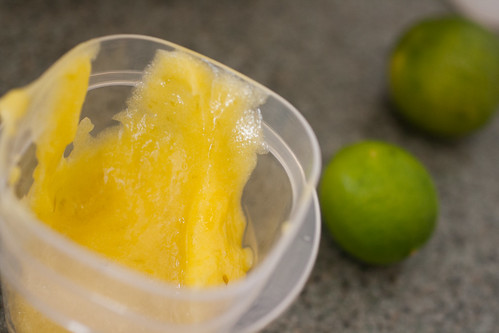
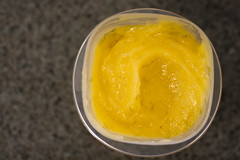
Key Lime Curd 
Despite my lack of posts this semester, I've been writing about food more than ever. Why, you may ask? That has an easy answer - I'm taking a course on the wonderful world of food writing. But it wasn't until this week that the topic approached something I could use not only as an assignment for class, but an excuse to update this blog as well.

Sitting in class last Thursday, I was handed two limes of differing sizes. The typical Persian lime and a small, surprisingly green Key lime. And with that, I knew I had to take an approach to the assignment of writing about limes and including a recipe to use the key limes. I sent my boyfriend to the grocery store with the request to pick up a bag of key limes if they were available, and he returned with a bag, but not before calling me to ask how to tell if limes are any good. (In case you're wondering, scald - those tiny brown patches - is okay, but if they're dried up, mushy, or wrinkly, that's bad.)

It took me three days to finally decide, but when I did, I decided on something that is more of an ingredient than a final product: Key Lime Curd. And since I made that, I needed to make some scones to eat with them. And then, as a wonderfully simple and delicious dessert last night, Key Lime "Mousse," which was nothing more than a half cup of heavy cream whipped to nice soft peaks, 1/4 cup of the lime curd, and then some vigorous whisking until it was an even consistency. Now that's simple and elegant.

Key Lime Curd
Key Lime Curd
Yield: ½ cup
If key limes are not available, substitute Persian limes in this recipe.

2 large eggs
1/2 cup granulated sugar
1/3 cup freshly squeezed key lime juice, from about 9 small limes
1 tablespoon grated key lime zest

1. Bring 2 inches of water to a simmer in a saucepan. Be sure that the mixing bowl you choose to make the curd in fits in the pan without touching the bottom.

2.With a hand mixer on medium or wire whisk, whip the eggs and sugar together into pale yellow and fluffy, about 1 minute with a mixer. Whisk in lime juice and zest.
           
3. Rest the bowl over the pot of simmering water. Cook, whisking occasionally, until the mixture is thick and custard-like, about 10 to 15 minutes, or until a thermometer reads 160ºF.

4. Fill a large bowl about halfway with ice and a cup of water to make an ice bath. Once the curd is thick, remove it from the stove and rest the bowl in ice bath, stirring occasionally, until cool.

5. Use immediately, or transfer to a container to store in the refrigerator for 3-5 days.

Wednesday, February 15, 2012

The 21st Birthday Cake

Guinness and Bailey's Chocolate Layer Cake

In the United States there's this mystique surrounding the 21st birthday. And by "mystique" I mean the ability to legally purchase your own alcohol and to legally imbibe in alcoholic beverages (responsibly, of course.)

With one of my friends slyly mentioned that her 21st birthday fell on a Friday, and that she would be having a party that night, I jumped at the opportunity. "May I make your cake as a present?" I asked her enthusiastically. She looked at me like I was crazy for even thinking the response might be a no. "Of course." Then a few weeks ago I sent her a text asking for some flavor suggestions. Her response? "Chocolate, raspberry, coffee, Bailey's, something with some of those?"

Beer and Bailey's


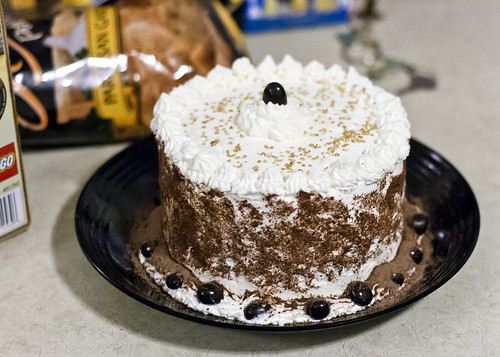
So with it being her 21st birthday and with that list of suggestions, what's more fitting for such an occasion than yet another cake with alcohol in it, not that this cake needs to be reserved for such an event. This one combines the Guinness ChocolateCake I made last year for my St. Patrick's Day-born aunt's birthday with a take on the awesome stabilized whipped cream from Tish Boyle's The Cake Book that I previously used in abourbon chocolate cake with a rich whipped chocolate ganache filling. So maybe she didn't mention beer, but swapping raspberry for beer sounded like a good idea, and decorating the cake with some dark-chocolate covered espresso beans threw in the coffee for good measure. And then there was the Bailey's making it's appearance in both the filling and the frosting.
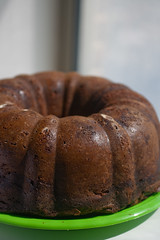
I'd like to think the fact that people ate so little of the cake doesn't mean that it was a failure. From all the compliments, especially from the birthday girl, I'd say it was a success. But after tacos and numerous beers, a cake this rich was just the icing on the cake - a very thin, delicious layer of icing.
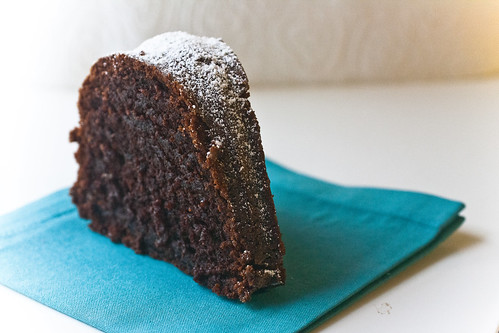

Guinness and Bailey's Chocolate Layer Cake
Makes a 6" round cake
Serves 10-20

For the Guinness chocolate cake layers:
adapted from Vegetarian Times, March 2006
2/3 cup stout, room temperature (I don't know how to measure beer. It was too frothy at the top, so I ended up using 2/3 cup+ with the froth since I did a bad job pouring)
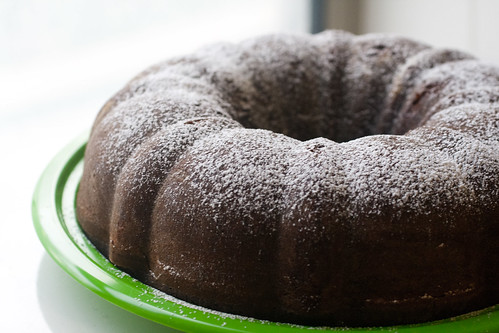
10 Tablespoons butter
1/2 cup cocoa powder
1 1/3 cups granulated sugar
1 1/3 cups all-purpose flour
1 teaspoon baking soda
1/2 teaspoon salt
1 large egg
1 large egg yolk
2/3 cup strained yogurt or sour cream
powdered sugar, for dusting

For the whipped chocolate ganache filling:
8 ounces bittersweet chocolate, chopped
2/3 cup heavy cream
2 Tablespoons Bailey’s Irish cream

For the whipped cream frosting:
1/4 cup (28 g) confectioner's (powdered) sugar
1 1/4 teaspoons cornstarch
1 1/2 cups heavy cream
1 teaspoon vanilla extract
1-2 Tablespoons Bailey's Irish cream

Chocolate covered espresso beans (optional, for decoration)
Chocolate shavings (optional, for decoration)

To make the cake layers:
Preheat oven to 350ºF. Butter a deep 6" round pan and line with buttered parchment and dust with cocoa powder.

In a heavy saucepan over medium heat, bring stout and butter to a simmer. Whisk in cocoa until smooth. Cool slightly.

In a medium bowl, whisk together flour, sugar, baking soda, and salt.

Beat egg, egg yolk, and yogurt with an electric mixer in a large bowl until smooth and blended. Add beer-chocolate mixture and beat to combine.

Beat in flour mixture for 15-30 seconds on lowest speed. Fold batter using rubber spatula until completely combined. Don't fold too much. Pour into prepared pan.

Bake about 50-60 minutes, or until tester inserted into center of cake comes out clean. Cool about 10 minutes on rack. If cake needs loosening from sides of pan, run a small knife around edges. Turn out cake onto rack (if using parchment, peel off) and let cool completely.

To make the chocolate ganache filling:
Place the chocolate in a small heatproof bowl. In a small saucepan, bring the cream to a gentle boil. Pour the cream over the chocolate and let sit for a minute. With a whisk, whisk the cream and chocolate until smooth, followed by the Bailey's. Let cool about 20 minutes or until cool, stirring occasionally. You can cool it off in an ice bath or the refrigerator to speed up the process. Once cooled, beat with a mixer for 30 seconds or until fluffy.

To make the whipped cream frosting:
In a small saucepan, whisk together the sugar, cornstarch, and 1/4 cup of the cream until smooth. Place pan over medium-high heat and bring to a boil, whisking constantly. Allow to boil for about 15 seconds. Remove the pan from the heat and let cool completely.

Once it cools, using the whisk attachment of an electric mixer, beat the remaining 1 1/4 cups of heavy cream with the vanilla extract and bourbon at medium-high speed until the cream begins to thicken and the whisk leaves a train in the cream. Add the cooled cream and cornstarch mixture and beat until stiff peaks.

To assemble:
Slice cake into three even layers.

Place the bottom layer on a cake round or a cake plate and affix with a bit of chocolate ganache. Spread the top with half of the chocolate ganache and spread a thin layer on the side to seal in crumbs. Place second layer on top and use remaining chocolate ganache and place final cake layer on top. If needed, refrigerate cake for a while before proceeding to next step if the cake seems like the layers will slide off.

Spread 2/3 of the icing on the top and sides of the cake. If using chocolate shavings, pat them on the sides of the cake now.

Place remaining icing in a pastry bag with tip or a baggie with a corner snipped off to decorate the cake.

Thursday, January 26, 2012

Cooking Carrot Cake Like It's The Seventies

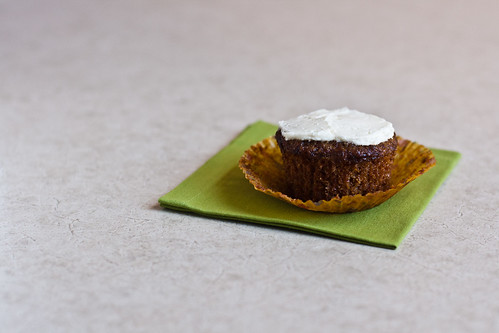
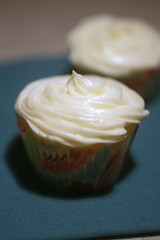
Carrot Cake Cupcake (Unwrapped)


Carrot Cake is delicious and tasty, and my thoughts on this subject clearly mean I was born in the wrong decade. Except, like fashion, food fads come around. And sure, red velvet cake may be the popular one right now, but hey, carrots are way more awesome than chocolate (okay, maybe they aren't) and you still get the cream cheese frosting!


But that's beside the point. Or maybe it is the point. I'm not quite sure. What I do know, however, is that I've made this carrot cake three times in the past month. THREE. I didn't even have the recipe with me the third time. That's how easy it is! It also means I have no idea where I originally got these proportions from, since I kind of just looked for a recipe that used the ingredients that I believed went into carrot cake, and went from there.

What prompted this carrot cake madness? Gorgeous carrots of course! Except they weren't all that pretty the third time. In case you were wondering, which you probably weren't, the carrots I used in Tehran were way more orange than the ones I picked up at a Schnuck's in St. Louis last week. But regardless of just how orange the carrots are, the cakes were tasty both places. The only time the cake, in my opinion, turned out less than stellar was when I cooked it in the form of a tube cake at my grandparent's garden house. Right before I was about to pour the batter into the pan, I thought it looked off, and realized I'd forgotten the oil. Adding oil at the last step meant overstirring the cake, bringing out the sticky property of gluten - not something you want in a tender cake. But, everybody still loved the cake, or at least they pretended to. All-in-all, I ended up giving four people the recipe for this cake while I was there. It'll be interesting to find out if any of them ever actually make it.

Carrot Cake Cupcake
Simple Carrot Cake
Note: This cake can make 2 9" cake rounds, or probably somewhere around 24 cupcakes, or a bundt cake, or a sheet cake. The cooking instructions below are for cupcakes.

2 cups all-purpose flour
2 teaspoons baking soda
2 teaspoons cinnamon
1 teaspoon ground ginger (alternately, you can use 2 teaspoons of fresh grated ginger)
1/2 teaspoon ground nutmeg
1/2 teaspoon salt
2 cups granulated sugar
4 eggs
1 cup canola oil
4 cups grated carrot (about 5-6 average-sized carrots)
1 cup raisins (or chopped, toasted walnuts), optional


Preheat the oven to 350ºF (180ºC). Line a cupcake pan with 12 liners. If you have 2 pans, line both, otherwise you'll need to bake them in two batches.

In a small bowl, whisk together the all-purpose flour, baking soda, cinnamon, ginger, nutmeg, and salt. Set aside.

In a large bowl, whisk together the sugar and eggs until pale and thick. Whisk in the canola oil.

Add the flour mixture to the wet ingredients, and with a spatula or wooden spoon, stir until just almost combined. Add the carrots and raisins or walnuts, if using and stir until all the flour is moistened.

Fill the lined muffin cups about 2/3 full of batter. Bake for 15-20 minutes, or until the tops spring back when lightly touched. Remove from oven and let cool for 5 minutes before transferring to a wire rack to cool completely.

Once cool you can top them with cream cheese frosting, if desired. See recipe below or use your favorite cream cheese frosting recipe.

Cream Cheese Frosting

8 ounces (1 package) cream cheese, softened
4 ounces (1 stick) butter, softened
1/2 teaspoon salt
1 teaspoon vanilla extract
1 cup powder sugar, or to taste

Beat together cream cheese and butter until smooth and fluffy. Beat in salt and vanilla extract. Slowly add powdered sugar and beat to incorporate.

Monday, October 24, 2011

Gooey Butter Cake Cookies

Gooey Butter Cake Cookies

It's been over a month since I've last posted, and it's not for a lack of cooking. Or photographing my food. It's just that whole problem of either having a good recipe or having a good photo, but rarely both. And then being pressed for time. Or writing half a post and never posting it because by the time I finish it, I've forgotten what I did if it's something I came up with, or if it's something I adapted, I can't find the original recipe and/or forgot my modifications.

But I'm not posting now to tell you all the things I haven't done, but to tell you what I have done. To remind myself of what I've done, I made an album on flickr of food I've made at school. Sure, it dates back to stuff from freshman year, but now it's organized! So if you see anything there that looks tasty and lacks a link back to this blog, then pester me and I can try to figure it out and post about it! Most of them say coming soon, but that might be a lie. I may never blog them because I'm forgetful (and, in the case of this cake, I found it underwhelming.)

And then, when I'm not cooking or baking (which definitely doesn't happen enough) I'm either in class, watching The OC with my roommate, studying, writing papers, or doing stuff for My Car And My Guitar or something. I'm not going to provide you with some exhaustive list you don't want, because that's just less time I can spend talking about these cookies. Which are an abomination by the way.
Gooey Butter Cake Cookies


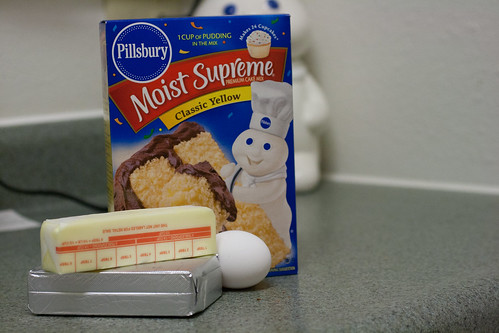
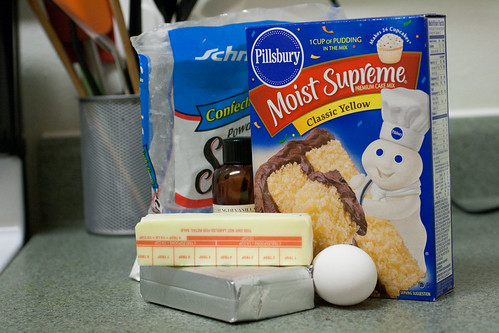
Yeah. See those ingredients? I seriously can't believe I made them. Not only that I made them, but that I've made them four times. Or maybe it's five. They're easy, affordable, and comforting. A twist on that St. Louis classic, Gooey Butter Cake, in cookie form! And they're not too expensive or anything, especially when cake mix is on sale and you can get it for $1 or less, and then the 75 cent stick of butter, the 20 cent egg, and the $2 cream cheese. I keep forgetting about powdered sugar, but it's like 45 cents of that probable. Five bucks and an hour of my time (including clean up) isn't too bad for around 3-4 dozen cookies!

And okay, I forgot some ingredients in the picture above. So here's the correction:
Gooey Butter Cake Cookies

But I never use the vanilla anyway.

But, like I said: Easy. Simple. Quick. Crowd-pleasing. So what are you waiting for?

Gooey Butter Cake Cookies
Makes 3-4 dozen cookies

1 box yellow cake mix
1 package (8 oz) cream cheese
1 stick (4 oz) butter, at room temperature
1 large egg
1/3 cup powdered sugar

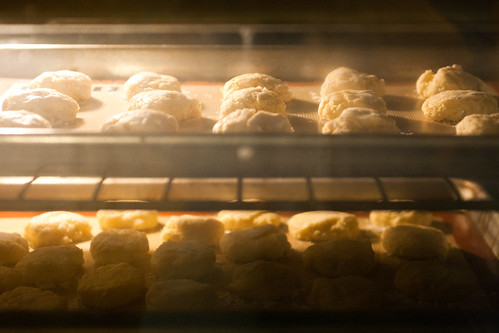
Preheat oven to 350ºF and line 2-3 cookie sheets (or just bake in batches!) In a large bowl, beat together cream cheese and butter until smooth. Beat in egg. With a spatula or wooden spoon, stir in the cake mix. It will be very thick, and may take a while.

Gooey Butter Cake CookiesGooey Butter Cake Cookies

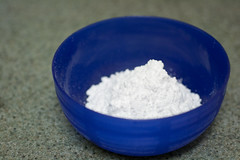
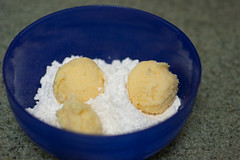
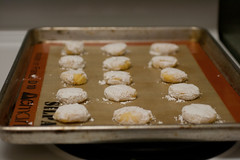
Pour powdered sugar into a small bowl. Roll heaping teaspoons of dough into balls and coat one side with powdered sugar. Place on baking sheet face up. Flatten slightly.
Gooey Butter Cake Cookies

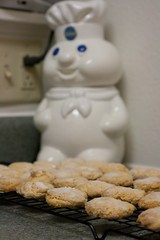
Bake cookies for 7-10 minutes, or until bottoms are browned and tops are crackly and dry. Enjoy!

Sunday, April 03, 2011

There's a pie in my cupcake!

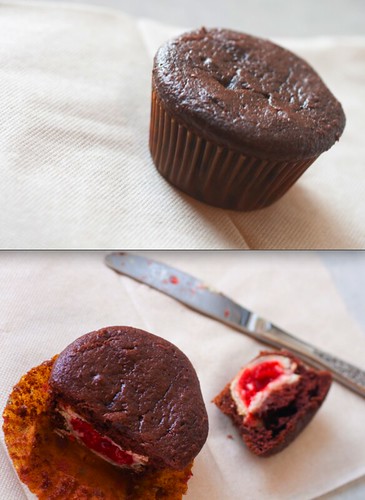
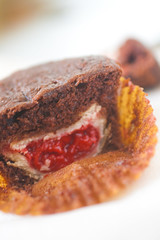
Surprise Cupcakes

Happy April! I'm a little belated with posting this, given that it's no longer April 1st, but they're fun for a party, and if decorated, I'm sure they'd actually be pretty. My butter just wasn't being nice, and neither was the microwave, so I opted out of frosting these cupcakes.

Over the summer, my friend texted me a picture of a chocolate cupcake with white frosting on top and a mini cherry pie in the middle that he saw online. I was intrigued, and told him I was tempted to try to make them. His birthday was a couple of weeks ago, and since it was midterms week, I decided to try to cut down on the weight of my groceries and the amount of time I'd spend on it, even if that meant sacrificing quality, so he could have a cupcake with a tiny pie in the center.

They're pretty simple to make, though because of the two steps, a bit more time consuming that just making plain chocolate cupcakes from a box, but only by about 20 minutes or so.

Surprise Cupcakes
Surprise Cupcakes
makes 12 surprise cupcakes, but can easily be stretched to make more

1 box chocolate cake mix (and the oil, eggs, and water the recipe calls for)
1 package refrigerated pie dough for a double crust pie
a can of cherry pie filling (you'll need about 2/3 cup or so of filling, maybe less)
frosting of choice, optional

Preheat oven to 450ºF. Cut pie dough into 12 2" circles, and press into a mini muffin pan. Fill each with a spoonful of cherry pie dough. Cut out 12 1" circles from remaining pie dough, and top each pie with the dough, pressing edges together. Bake for about 8-10 minutes, or until edges are golden. Remove from oven and let cool until you can remove them from the pan, about 5 minutes. Decrease oven temperature to 350F.

Meanwhile, prepare chocolate cake mix as directed.* Line a muffin pan with 12 liners, and scoop a heaping tablespoon of batter into each one. Place a mini pie in each muffin cop, and top with another heaping tablespoon of batter so that they are completely covered. Bake in 350ºF oven for about 15-20 minutes, or until tops are dry and spring back when pressed lightly. Remove from oven. Cool slightly in pan, and then transfer to a wire rack to cool completely. Ice or enjoy as is!

• Since it should make enough for 24 cupcakes, you'll have extra batter. Alternately, you can buy/make more pie dough, or make more mini pies, and make that number of the cupcakes as described enough (my guess is around 30 total) or just make extra plain cupcakes with the remaining batter. A package of pie dough should have enough crust for about 14-16 mini pies. My guess is that a small can of cherry pie filling will probably make about 20 or so pies.

Friday, February 18, 2011

The Gluten-Free Layer Cake

Peach Schnapps Layer Cake

Last semester while talking to one of my roommates, it was discovered that she likes peach schnapps. She really likes peach schnapps, and, it's not something that makes her sick. Well, in moderation. I'm sure if she got a little too excited and drank a bit too much, she wouldn't feel so great. But since schnapps happen to be gluten free, she can imbibe in the candy-sweet alcohol as long as nobody's carding her.

It's not a secret that I don't shy away from baking, cooking, or lowering freezing points with alcohol, so it shouldn't come as a surprise that I decided to challenge myself to make a gluten-free cake incorporating the sickeningly sweet smelling schnapps.

Unfortunately, she never did get to try the cake that was originally imagined for her birthday, but all the gluten-tolerant tasters thought it was quite tasty. One even remarked, "Is this really gluten-free? It's really good." And, unless my checking all the labels failed me, it really is!

Making this cake was not without some slight hitches, mostly because of my lack of sleep and attention. I took all the ingredients out to bake the cake layers at 7pm last Friday night, after sleeping a mere 2 and a half hours in the previous 36. I failed to notice that I was looking at a recipe that made 80 mini cupcakes. A 6" cake does not require 4 pounds of batter, which I think is what I ended up with. I started divying up the batter by weight, hoping to make equal layers, and when the first one came out of the oven, I realized if I used more than just that for the cake, I'd end up with a leaning tower. I baked off a dozen cupcakes and a slightly smaller cake layer that I ended up omitting from the cake, deciding to go with a slightly shorter cake (If you follow the recipe below, yours may end up a bit taller than pictures from this recipe, but no worries! There's just enough frosting to take care of that!) Plus, it never hurts to have an extra 12 ounces of cake lying around. With the addition of some whipped cream and frozen fruit, it can be turned into a tasty (but extremely unphotogenic) mango trifle later in the week!

Peach Schnapps Layer Cake
Peach Schnapps Layer Cake That Just So Happens To Be Gluten-Free
makes 1 6" 3 layer cake

For cake layers:
1 cups (200 g) granulated sugar
2 large eggs
1 1/4 cups gluten-free rice flour all-purpose mix (I used 200 grams of Gluten Free Pantry All Purpose Flour)
1/4 teaspoon salt
1 1/2 teaspoons baking powder
1/2 teaspoon xanthan gum
1/2 cup canola oil
1/2 cup milk
*add a teaspoon of vanilla extract, especially if you want to skip out on the schnapps

2/3 cup peach preserves

For peach schnapps syrup:
1/4 cup (50 g) sugar
1/2 cup water
2 Tablespoons peach schnapps

For peachy buttercream:
1 cup/2 sticks unsalted butter, softened
2 1/2 cups powdered sugar
pinch salt
1/4 cup peach preserves


To prepare cake layers:
Preheat oven to 350ºF. Grease a 6" round cake pan (mine's 3" deep).

Beat sugar and eggs in large bowl of electric mixer at medium speed for one minute. Add flour, salt, baking powder, xanthan gum, oil, milk, and vanilla and beat at medium speed for about a minute, or until batter is smooth.

Scoop batter in prepared cake pan. Place pan in center of oven and bake for about 45 minutes or until top springs back when lightly touched or a toothpick in the center comes out with only a crumb or two. Remove from oven and cool on a wire rack for a few minutes, remove from pan and cool completely.

To prepare sugar syrup:
Heat water and sugar in a small saucepan, stirring, until sugar is completely dissolved. Remove from heat and let cool. Stir in schnapps.

To prepare frosting:
Place butter in a medium bowl and beat until fluffy. Add powdered sugar and salt and beat until smooth. Beat in peach jam. (If planning on piping frosting, you may want to set aside some frosting before adding jam to prevent getting clumps stuck in your bag.)


To assemble cake:
Level the top of the cake. Slice cake into three layers. Place the base of the cake on a cake plate or large plate, sliced side up. Brush with syrup. Spread 1/3 cup peach preserves over cake layer, and top with another layer of cake. Brush with syrup and spread remaining 1/3 cup preach preserves over the layer. Top with the remaining layer of cake and brush entire cake with remaining syrup.

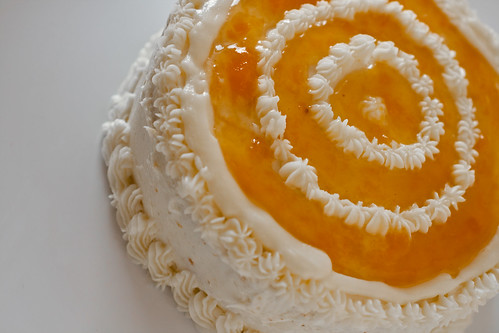
Scoop about 1 cup of frosting on the top of the cake and spread over the top and sides of cake, adding more frosting as necessary. Smooth sides and top, and, if desired, pipe designs with remaining buttercream.

Store in refrigerator for up to 2 or 3 days. Take out about 20 minutes before eating or it'll be too cold and not taste as awesome.

Monday, February 14, 2011

Truffles for Your Valentine

Chocolate Raspberry Cream Cheese Truffles


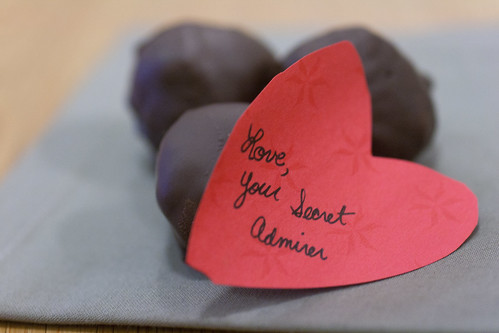
It was approaching seven at night, and upon receiving a text from my friend about receiving a box of chocolates, I realized that it was Valentine's Day. And with Valentine's Day comes an excuse to eat chocolate whether you're single or otherwise preoccupied.

The dessert cases here at school had heart and red-themed treats within them, but if I was going to enjoy something chocolate or red, it was going to be on my own terms, and while celebrating the nice break from schoolwork. I was going to make truffles a week or so ago and bought the ingredients, and decided, what's a better thing to treat myself to on Valentine's Day?

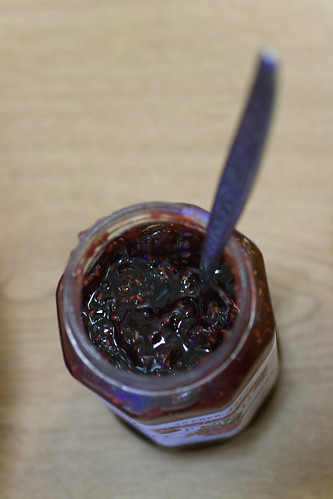
Raspberry Jam


I decided to add a festive twist, and with that, I cranked up the Taylor Swift, whipped out the cream cheese, chocolate, and raspberry preserves, and while covering the table and microwave in chocolate, made these yummy little morsels. I wiped the chocolate off my face, and then proceeded to wander around and share them with a grin upon my face.


Chocolate Raspberry Cream Cheese Truffles
Raspberry Chocolate Cream Cheese Truffles
makes about 36

1 8 oz. package cream cheese or neufchatel, softened
8 ounces semi-sweet chocolate, melted
1/3 cup raspberry preserves
10-12 ounces semi-sweet chocolate (melted but later on)
decorations (i.e. sprinkles, chopped nuts, etc), optional

Beat the cream cheese until fluffy and beat in the chocolate and raspberry preserves. Chill until firm enough to handle and then scoop and shape teaspoonfulls into balls.

Chill for half an hour or so, and then dip into melted chocolate and place on a sheet of wax paper or silicone mat (and top with sprinkles or something if desired).

Refrigerate for a few hours until chocolate is set.

Enjoy!

Wednesday, December 01, 2010

"Why aren't there walnuts in these brownies?"

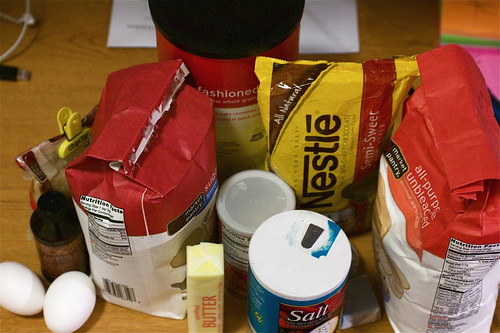
Ingredients for Oat Brownies

Because they have oats, Granma.


Right before heading home for Thanksgiving Break, I realized I had half a dozen eggs in my fridge that were going to go bad. I could do the easy thing: borrow a skillet and make scrambled eggs for me and a couple other people for dinner. Or I could bake 6 eggs worth of things. There was like a pound of butter in the fridge, so it wasn't like I had to go to the store or anything like that.

I wanted to try something new, and since I have a giant container of oats (and by giant, I mean a measly 2lb container) I decided to try out Bruce Weinsten's Oat Brownies from The Ultimate Brownie Book. I didn't vary much up, and I think next time, I might add some cinnamon to these, though maybe that's just because I really like cinnamon. And because I'm running out of vanilla extract.

They were fudgy, chewy, and crispy, all at the same time, thanks to the oats. He calls for toasted oats, but I find that when fighting over a kitchen with a bunch of other people, that's not really possible. When I finally did get control over the oven, it wasn't all easy sailing, but that may have made them tastier. The fact that the oven kept getting opened and closed (someone needed to make toast while I was using the oven), and all the rapping caused the brownies to collapse into a wonderful chewy goodness. (If you haven't noticed, I'm a fan of chewy brownies over cake-like ones.)

Granma's the only person who seemed disappointed by these brownies, but I think that's because she was expecting these brownies. Maybe one day I'll post the 9x9 version of that recipe... Winter break?


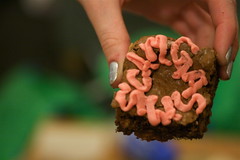
Decorated Oat Brownie
Oat Brownies
from Bruce Weinstein's The Ultimate Brownie Book
makes a 9-inch square pan of brownies (which is sixteen to the average person)

1/2 cup (63 grams) all-purpose flour
1/2 teaspoon baking powder
1/2 teaspoon salt
1 stick (4 ounces/113 grams) unsalted butter
2 ounces (66g) semisweet chocolate, chopped (or chocolate chips in a pinch)
2 ounces (66g) unsweetened chocolate, chopped
1 cup (218 g) packed brown sugar
1/2 cup (100 g) granulated sugar
2 large eggs, at room temperature
2 teaspoons vanilla extract
1 1/2 cups (120 g) rolled oats (he recommends toasting them for 5-7 minutes, I omitted this step)

Position oven rack in lower third of oven. Preheat oven to 350ºF. Butter and flour/line with greased foil/whatever your preferred method of "preparing" a 9 in. square pan; set aside.

Whisk together the flour, baking powder, and salt. Set aside.

Place butter and both kinds of chocolate in a microwave-safe bowl. Microwave in 30-second intervals, stirring between, until the chocolate is melted and stir until smooth and all evenly melted. Set aside to cool. (Or do this over a double boiler, removing from heat as soon as chocolate is melted. Butter will finish melting as you stir.)

In a large bowl, beat the brown sugar, granulated sugar, and eggs with an electric mixer (or, if you're working on your arms, with a whisk for about 6 minutes) until sugar has dissolved and the mixture is thick and creamy. Beat in vanilla and cooled chocolate mixture. Beat until smooth and uniform, scraping down the sides of the bowl as necessary.

With a spatula or wooden spoon, stir in the oats. Then fold in the four mixture until just incorporated. Don't beat up your brownie batter. Pour the batter into prepared pan and gently spread to corners.

Bake for 20 minutes or until top is dry and a toothpick comes out with just a few moist crumbs.

Set aside to cool on a wire rack for a while. Cut into desires number of pieces and enjoy!

Sunday, August 29, 2010

A Friendly Hello

IMG_5627

I'm back at school now, as anticipated in my previous post. I have my own room, with paper thin walls, a new set of metro shelving around my desk displaying my bowls and pans to tempt me from my studies (and because I have trouble reaching the shelf in my closet), and three very sweet suitemates, one of whom has a whole host of food sensitivities.

But I'm not one to purposely exclude people, especially not in the first few days back, so I offered to look up some recipes and make some gluten-free cupcakes that we could deliver to our fellow residents of the building, and that she could enjoy.

So together (though it was mostly her, I just did the grocery shopping and provided the materials and recipe printout) we made vanilla cupcakes, and then, along with our other two suite mates, wandered the halls of our residence hall, meeting new people. Except I don't really remember anyone I met yesterday, which isn't a good thing... But hopefully people remember my suite mate's name, because she's running for res college president. So shh... it's too soon to campaign yet.

IMG_5615
Gluten-free Vanilla Cupcakes
adapted from Cupcakes Take The Cake
makes around 80 mini cupcakes

2 cups (400 g) granulated sugar
4 large eggs
2 1/2 cups gluten-free rice flour all-purpose mix (I used 400 grams of Gluten Free Pantry All Purpose Flour)
1/2 teaspoon salt
1 Tablespoon baking powder
1 teaspoon xanthan gum
1 cup canola oil
1 cup milk
2 teaspoons pure vanilla extract
2 cups of favorite frosting (if not homemade, make sure it's gluten free)
Preheat oven to 350ºF.

Place cupcake liners in mini-muffin pans. You probably don't own enough pans, so you'll probably need to bake the muffins in batches.

Beat sugar and eggs in large bowl of electric mixer at medium speed for one minute. Add flour, salt, baking powder, xanthan gum, oil, milk, and vanilla and beat at medium speed for about a minute, or until batter is smooth.

Scoop batter in prepared baking pan. Place pans in center of oven (or in top and bottom thirds and rotate halfway through baking(, and bake for about 15 minutes or until top springs back when lightly touched. Remove from oven and cool on a wire rack for a few minutes, remove from pan and cool completely before icing with frosting of your choice.

Share and enjoy!

Tuesday, August 24, 2010

Summer's Almost Over Again?

IMG_5554

I can't believe how much I've neglected my blog over the summer, but come to think of it, I've also neglected the kitchen. Between being busy surrounded by baked goods all day, not knowing when/who would be around for dinner, and being pretty tired after spending the day in 80º+ weather, I just never really cooked or baked much, all summer.

But that still doesn't excuse this neglect. There were things baked, there were things eaten. There were tasty salads that my dad whipped up from leftovers (can those ever be replicated though?). There was an almond pound cake I decided to bake in my 6" cake pan, with a batter-filled center that fell out-yet I managed to save it and it turned out quite delicious. There was my birthday cake, and adventures in making meringue buttercream that I ended up not using. There was a disgusting looking cake that was tasty to celebrate my friend's Notre Dame acceptance. There was my failure of a cake for my dad, that was eventually turned into a week of trifles. There was lots of smoky grilled salmon, courtesy of my dad.

But that still left me, somehow, with a blog with no posts since the beginning of June. It's the end of August practically, and I'm sitting in the waiting room while my mom's car gets serviced. And soon I'll be back to using a dorm kitchen, carrying my supplies up and down stairs, and making (and keeping) friends through their stomachs.

But I'll stop with my regretful babble. Because I have a recipe for you. It's kind of a tres leches cake, but I doubt it's very authentic, considering it's adapted from an old recipe from Cooking Light.

But it was a hit, despite being cut into 24 fairly small, yet rich, pieces, and served with some blueberries on the side. And the torched meringue top (sure, a broiler would've been easier, but where's the fun in that?) added a nice little twist as well, at least aesthetically, that is.

Tres Leches Cake
serves 12 (unless you make small pieces, in which case, 24 not-very-hungry people)

For the cake:
7 large egg whites
1/4 teaspoon salt
2/3 cup sugar
3 large egg yolks
1 teaspoon vanilla extract
2/3 cup all purpose flour

For the milk mixture:
1 cup half-and-half
1 can (12-oz) evaporated milk (fat free or 2% work fine)
1 can (14-oz) sweetened condensed milk (fat free works fine)

For the meringue topping:
3 large egg whites
1 cup sugar
1/3 cup water
1/2 teaspoon coconut extract (optional)

Preheat oven to 350°F.
Grease and flour a 9x13 pan. (I'm usually a fan of metal pans, but in this case, a pyrex dish might work better. I transferred mine to one after baking when I realized that it made more sense with the milk mixture.)

Place egg whites and salt in a large mixer bowl; beat with a mixer at high speed until soft peaks form. Gradually add 2/3 cup sugar, 1 tablespoon at a time, beating until stiff peaks form. Place egg yolks and vanilla in a large bowl (most stand mixers won't be able to mix this amount, so whisk by hand or use hand beaters); beat until thick and pale. Fold 1/3 of egg white mixture into egg yolk mixture. Gently fold 1/3 cup of flour into egg mixture. Gently fold in another 1/3 of the egg whites. Fold in remaining 1/3 cup of flour, followed by the rest of the egg whites.

Spoon batter into prepared dish. Bake at 350° for 20 minutes or until cake springs back when touched lightly in center. Cool 5 minutes in pan on a wire rack.

For the milk mixture, combine the half-and-half, condensed milk, and evaporated milk in a 4 cup measuring cup, or bowl. Pierce all over the top of the cake with a fork, and pour the milk mixture slowly and evenly over the cake. It will be soaked, with milk mixture sitting on top a bit. Let it absorb for about 15 minutes or so.

For the meringue topping, beat 3 egg whites with a mixer at high speed until foamy. Combine 1 cup sugar and 1/3 cup of water in a saucepan and bring to a boil. Cook, without stirring, until a candy thermometer registers 238°F. Beating the egg whites at high speed, pour the hot sugar syrup in a thin stream over the egg whites. Stir in the extract. Spread over cake.

Refrigerate cake until ready to serve. Just before serving pop under the broiler for 10-15 seconds (keep an eye on it) or until the top is just lightly browned, or use a small torch and gently torch the top of the cake. (This step isn't necessary, but fun.)

Saturday, June 12, 2010

Bourbon Chocolate Layer Cake

IMG_4633


Parents out of town. House to myself. Speakers set up. Saturday. Booze.

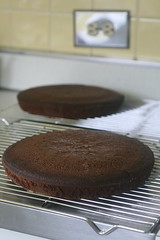
I'm not your typical teenager. Because all that added up to a layer cake for a family friend, not a crazy party. It was a variation of a cake I made for my RA's 21st birthday, the Chocolate Bourbon Cake from Simply Recipes. Only, instead of a bundt cake, I made a layer cake. Two 9 inch bourbon chocolate cake layers with whipped cream with a hint of bourbon in between and all around, and covered in a rich chocolate ganache.

I'll be honest, I don't know what it tasted like all together, but from the wonderful thank-you voicemail I receiver on Sunday night from the birthday boy, I can only imagine that it was tasty.

Bourbon Chocolate Layer Cake
cake from Simple Recipes
frosting and ganache from
The Cake Book by Tish Boyle


For cake:
1 cup (2 sticks) butter, room temperature
2 cups (400 grams) granulated sugar
2 cups (242 grams) all purpose flour
5 ounces bittersweet chocolate, melted and cooled
1/4 cup instant coffee or espresso (I used 2 Tablespoons of each)
1 cup bourbon
1/2 teaspoon salt
3 eggs, room temperature
1 Tablespoon vanilla
1 teaspoon baking soda

For whipped cream filling/frosting:
1/2 cup (57 g) confectioner's (powdered) sugar
2 1/2 teaspoons cornstarch
3 cups heavy cream
1 teaspoon vanilla extract
1 Tablespoon bourbon whiskey

For chocolate ganache:
8 ounces (227 g) bittersweet chocolate, chopped
1 cup heavy cream


To make cake layers:
IMG_4646
Preheat oven to 350ºF. Grease 2 9" round cake pans. For easier removal, grease and line bottom with parchment as well.

Place instant coffee in a 2 cup measuring cup and pour boiling water up to the 1 cup line. Stir to dissolve. Stir in bourbon and salt; set aside to cool.

In a large bowl or the bowl of a mixer, beat together butter and sugar until light and fluffy and not grainy. Add eggs in one at a time, beating well after each addition. Beat in the vanilla, baking soda, and chocolate.

Add 1/3 of the whiskey mixture, followed by 1/2 of the flour mixture. Alternate the whiskey and flour, stirring or beating after each addition, with remaining whiskey and flour.

Divide evenly between prepared pans. Bake in oven for about 35 minutes, or until top is dry and a toothpick inserted in center comes out with one or two crumbs attached. Or clean.

Let cool in pans 15 minutes. Turn out onto wire rack to cool completely.


IMG_4655
To make whipped cream:

In a small saucepan, whisk together the sugar, cornstarch, and 1/2 cup of the cream until smooth. Place pan over medium-high heat and bring to a boil, whisking constantly. Allow to boil for about 15 seconds. Remove tthe pan from teh heat and let cool completely.

Once it cools, using the whisk attachment of an electric mizer, beat the remaining 2 1/2 cups of heavy cream with the vanilla extract and bourbon at medium-high speed until the cream begins to thicken and the whisk leaves a train in the cream. Add the cooled cream and cornstarch mixture and beat until stiff peaks.


To make chocolate ganache:
IMG_4643
Place the chocolate in a small heatproof bowl. In a small saucepan, bring the cream to a gentle boil. Pour the cream over the chocolate and let sit for a minute. With a whisk, whisk the cream and chocolate until smooth. Let sit at room temperature until ready to use. If making far in advance, up to a week, refrigerate and warm to a pourable consistency. If the ganache is too cold before using it, place bowl over a bowl of simmering water, whisking until slightly warmed.

To assemble the cake:
Place to squares of parchment paper on a cake plate with the center crease across the diameter. Place the first cake layer face up on the plate. If overly domed, level the layers first.

Cover with about 1 cup of the whipped cream and spread to the sides. Top with other cake layer. Top with another cup of whipped cream and frost the top and sides of the cake. Freeze for about 5 minutes and then frost with remaining whipped cream. Freeze for 15 minutes.

IMG_4660

Remove the cake from freezer and pour the chocolate ganache over the cake. Using an offset spatula, cover the cake with the ganache. Place in the fridge until set, and remove the parchment from under the cake.

IMG_4661IMG_4664

Keep refrigerated until about 30 minutes before serving.

Saturday, April 10, 2010

Well, I could've been at a frat, but I decided to bake a cake instead

IMG_3946

I've been throwing out bananas a lot lately. It's really a shame. On top of it being a waste of perfectly good bananas, it's also a waste of money. Usually I have the foresight to throw ripe bananas into the freezer, but in falsely believing that "I'll just use them tomorrow," they get to be too black to even consider saving.

After a delicious three-course meal last night, courtesy of a very friendly family whose daughter is trying to decide where to go to school next year, my roommate and I returned to our room a bit after ten. And I saw the bananas.

I was going to make banana cookies, but there were three bananas. And I don't really have the patience to make a triple batch of cookies by myself. All that scooping would get old awfully fast.

So I decided I'd use my bundt pan, and some of the bananas already in the freezer. I picked out a recipe, started to defrost 5 bananas, and made a grocery list of things I could get on campus (plain yogurt, however, is not a possibility, but sour cream is!), and got to work. Well, sort of. Along the way, I was given the offer of going to a fraternity party, which has been on my to-do list for a while, but those bananas were calling my name. It'll just have to wait until another night.

And this cake is tasty, so I'd say worth the alone time. Granted, someone walked in on me dancing around the kitchen to All Time Low at 2 in the morning in an effort to keep myself awake, but hey, it was the awesome smell wafting down the hall that attracted them, so I'd say that's always a good sign.


IMG_3932
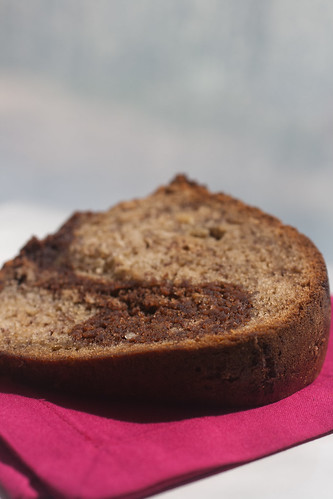
Nutella-Swirled Banana Cake
heavily based on this
makes 1 large bundt

4 cups all-purpose flour
1 1/2 teaspoons baking soda
1 teaspoon salt
1/2 cup (1 stick) unsalted butter, softened
2 cups granulated sugar
4 large eggs
2 1/2 cups mashed bananas (about 6-8 bananas)
1 cup (8 oz container) sour cream
1 1/2 cups chocolate hazelnut spread (Nutella)

Preheat oven to 350ºF. Grease and flour a 12-cup bundt pan, set aside.

In a small bowl, whisk together the flour, baking soda, and salt; set aside.

In a large bowl or the bowl of a stand mixer, beat the butter and sugar together until the sugar is incorporated and it's nice and fluffy. Add the eggs, one at a time, beating well after each addition. Beat in the bananas and sour cream.

In a 4-cup microwave safe bowl, warm up the nutella for about 15-45 seconds, depending on your microwave, until it's easy to stir. Stir in about 2 cups of the banana batter.

To make a more swirled cake: Alternate between adding the banana and nutella batters to the pan; gently swirl batters together by running swirling a knife through the batter after it has all been poured into the pan.

For a less swirled cake: Pour the banana batter into the pan. Pour the nutella batter on top of it.

Bake for 70-90 minutes, or until a toothpick inserted not near an edge comes out with just a few crumbs attached.

You may need to cover the top of the cake with foil to prevent it from overbrowning. If you have a 10-cup bundt pan, like me (I think), it's going to come up over the top of the pan, making for a less pretty cake that bakes slightly less evenly, but it still delicious.

Alternatively, you could use 2 loaf plans; reduce the bake time to 60-70 minutes.

Tuesday, April 06, 2010

Drunken Birthdays

IMG_3925.jpg

So today is my RA's 21st birthday. One of my floormates told me this fact last night around 10 pm. Which gave me limited time to think: Nutella Brownies for which I have all the necessary ingredients; the omnipresent banana oatmeal cookies; or, I could be "cheeky" and go with a bourbon cake. I was originally aiming for a bourbon pecan cake, since I love bourbon pecan sauce, but I couldn't find one that would be easy enough to make. And it seemed like most bourbon cakes called for bundt pans, which until 6 hours ago, I didn't have.

But with my heart set on making a bourbon cake, I made one. Even after the floormate who was going to make the cake with me had a sudden schedule conflict, I was undeterred, leading to a conflict of my own (oops!). I hung out in the kitchen alone, blasting my iPod and keeping track of the number of songs were by bands I'd seen live (62% of them were, in case you were wondering.) Once the cake had uneventfully made its way into the oven in my new pan, I settled down to read an article for my writing class as the lounge began to smell like a warm and comforting combination of whiskey and chocolate. I think I may have violated Redd Flag policy, with the wonderful smells wafting from the kitchen, but I'm pretty sure I'm not going to get in trouble for it. I mean, my RA did seem to like her cake...

IMG_3911.jpg


This cake is boozy, quite so. There is no doubt that it's a bourbon cake, not at all. I think I sort of shocked my RA with it. She did call me "cheeky" for making a bourbon cake, and, in the e-mail that she sent out to the floor, made sure to note that this is the only time she'll ever be offering us something with alcohol in it.

IMG_3916.jpg


So without further ado, here's the link to Elise's recipe. I didn't mess with it, except for not sprinkling the cake with bourbon after removing it from the pan. I used 72% cacao chocolate, and instant coffee. And so far, the cake has had a positive response. You just might not want to "taste" the batter. But really, this chocolate bourbon cake is definitely worth giving a try.

Oh, and those nutella brownies? Hold tight, because I plan on trying those out soon. And who knows, now that I have a bundt pan, I might just have to make another bundt cake sometime.

Sunday, April 04, 2010

Springtime and Easter

IMG_3819.jpg

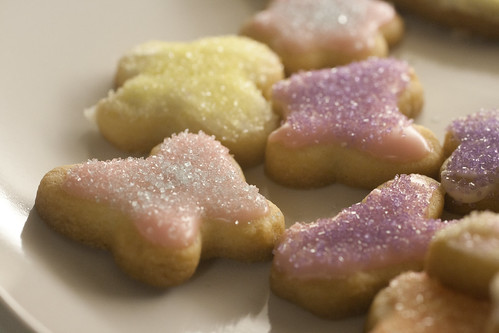
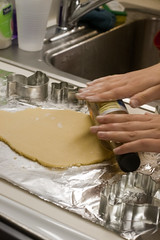
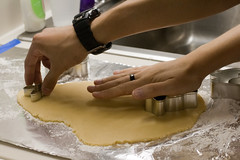
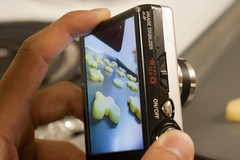
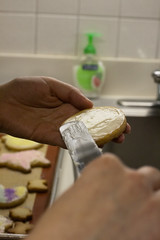
My friend's mom sent her easter cookie cutters and colored sugar, among other things, in the mail. So of course, she had the perfect excuse to make sugar cookies. A bit of planning, some distressed phone calls to her mom, and five people in a small dorm kitchen later, magic happened. Well, if sugar cookies can be considered, that is.

IMG_3765.jpgIMG_3778.jpgIMG_3805.jpgIMG_3788.jpgIMG_3806.jpgIMG_3832.jpg


IMG_3838.jpg
Sugar Cookies
recipe from Ashleigh's mom, we halved it, as reflected here, for a small and manageable amount of cookies

2 sticks (1/2 lb) butter, softened
3/4 cup granulated sugar
1 egg
1/2 teaspoon vanilla extract
2 1/2 cups all-purpose flour

Preheat oven to 375ºF.

In a large bowl, cream together the butter and sugar. Beat in egg and vanilla extract. Slowly beat in flour. If dough is too sticky, add slightly more flour.

Roll dough out onto a floured surface to about 1/4" thickeness. Cut out into desired shapes. Reroll scraps.

Place on cookie sheet about 1/2" apart. Bake 7-12 minutes, or until edges are a light golden brown. Be careful, they can go from pasty looking to sunburnt really quickly.

Let cool. Frost or ice as desired.

Friday, March 12, 2010

Fall Dessert For Spring Break

IMG_3376

So I have problems with seasons? Is that really that bad? I mean, it feels like summer right now, there's piles of snow on the ground, and grocery stores carry practically everything year round. How am I supposed to not be confused?

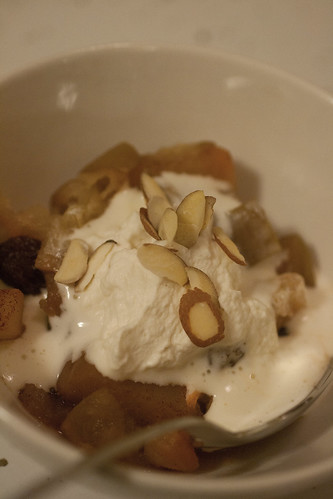
Apples are delicious. Especially when they aren't of the Red Delicious variety, but more tart, like a Granny Smith, or crisp, like a Braeburn. I'm happy now. And you should be, too. I'm updating, and sharing a sort of recipe for something quite tasty. But maybe, just maybe, you should wait for cooler weather come November to make this. Because right now, I think something along the lines of lemon cheesecake fits the weather better. But maybe not the season.

But instead, out of the oven comes what resembles an apple crumble or cobbler, minus the topping. Spooned into bowls and topped with a maple whipped cream, it was a tasty ending to my dad's delicious dinner, far too fancy to be eaten on the couch while watching the Academy Awards. But that's (sort of) just what we did.

IMG_3359IMG_3365

And this is also a testament to the reason I shouldn't start posts and finish them a month later. I don't remember what I did to make that. I just remember it contains apples, cinnamon, and maple syrup, and maybe some salt baked in the oven. And that the whipped cream was heavy whipping cream that I attempted to use almond extract in, didn't like the results, and covered it up with maple syrup. And then topped it with almonds, that if I had the foresight, I would have toasted.