Showing posts with label college. Show all posts

Sunday, February 10, 2013

It Feels Like a Perfect Night for Breakfast at Midnight

I'm a pretty big Taylor Swift fan. I remember being fascinated by the adorable girl with the curls singing "Our Song" when my friend showed me the video and then hearing off key versions of "Love Story" far too frequently coming from the boy who sat next to me in Number Theory. Then, the first friend I made in college had a penchant for randomly bursting into "You Belong With Me," regardless of if it was a socially acceptable time.

So when Taylor Swift released Red last October, it was pretty much perfect timing. About twenty minutes into the record is the wonderfully ridiculous ode to being a "happy, free, confused, and lonely" pop star and, well, being 22.


And, well, most of my friends are slowly turning 22. And I now have an excuse to play Taylor Swift songs under the pretense than it's appropriate for the occasion.

And, while this wasn't the inspiration for at all, and definitely not my first time eating breakfast at midnight, when I realized that we were celebrating my friend's birthday with a midnight breakfast, I couldn't help but think of the song.

Bourbon Pecan Sauce
similar to version I made before adapted from Dec. 2006 Cooking Light, pg 174
makes 1 - 1 1/2 cups

1/3 cup brown sugar
1/3 cup granulated sugar
1/3 cup water
1/3 cup chopped pecans, toasted
2 tablespoons milk
1 1/2 tablespoons butter
2 tablespoon bourbon
Combine sugars and water in a small saucepan over medium high-heat, stirring constantly until sugars dissolve and it no longer looks grainy, about 3 to 5 minutes. Stir in remaining ingredients. Lower heat to a medium-low and cook until mixture is bubbly and thickened, about 5 minutes.

It's really tasty with fluffy dollar sized pancakes, freshly whipped cream, and bananas.

Friday, October 19, 2012

Curried Eggs

Curry Spiced Eggs

I'm not entirely sure when my weird obsession with turmeric started. And I'm not even sure it's a weird obsession. I just think potatoes and onions look funny unless they're stained with its yellow hue.

But anyway, it's a Friday and lunchtime and I'm standing in the kitchen with eggs and curry powder and turmeric and nutmeg and a quarter of an old onion and half a package of goat cheese sitting on the counter in front of me while I wait for the oil in my tiny little skillet to heat up. I like my skillet. It's cute and adorable and the perfect size for making eggs just for me, and I smile, and thinly slice the onion and listen to the sizzle as the onion hits the now-hot oil. Turning up the dulcet tones of the Taylor Swift song filling my ear, I sprinkle a bit of salt and turmeric powder over the onions, and they turn a beautiful golden shade as I stir them...

I also, clearly, have been craving narratives. Terrible narratives that we both know I can't write, and that definitely have no place here. But regardless, it's Friday (does that mean it's the freakin' weekend yet and I can have me some fun? Nope. Not this weekend) and I made myself some delicious eggs and gluten-free toast for lunch. (As to why the toast was gluten-free, that's a different story, and it'll come later.) And despite the funny looks I get from my roommates for putting curry powder in my eggs, I like to think of it as sophisticated, though surely that isn't actually true. And I'm far from the definition of "sophisticated" with my bright pink melamine plates and heart-covered tumblers. But hey, it works for me. As does listening to this song on repeat. Yep, that definitely puts a smile on my face.

Spices in my eggs!


As for this recipe, it's not really that specific. There are no proportions here for the spices, because I pretty much just decide by thinking, "Hm, that smells like a good amount." I like spices. I could've been happy dumping even more spices in here. But eggs, onion, and curry powder go together wonderfully. And goat cheese just mellows it out and makes it even creamier.

Curry Spiced Eggs
Curried Scrambled Eggs
this feeds 1 person, maybe
2 teaspoons oil
1/4 small onion, thinly sliced
2 eggs
3 tablespoons milk
curry powder - or - nutmeg and turmeric (or both)
salt
pepper
goat cheese

In a small skillet, heat oil over medium heat. Add onion and cook, stirring occasionally, until soft. You can add some salt to taste, and turmeric if desired.

Meanwhile, in a small bowl, whisk together eggs, milk, and curry powder. I use a around 1/4 teaspoon of a sweeter curry powder. Sometimes I just use turmeric and nutmeg instead of a curry powder. Season with salt and pepper if desired.

Pour eggs over onions, and reduce heat to low. Stir constantly until no longer runny but not completely dry, about 3 minutes. Add goat cheese, stir once more, and then remove from the pan and enjoy!

Friday, October 05, 2012

Oops... I Did It Again

Stereotypical St. Louis

I'm back in St. Louis again. St. Louis. I don't know what else to say about it. Other than since moving here for school I've been neglecting this thing terribly. And I guess it took my friend mentioning a strategy I taught her to make me realize just how much I miss this. And that maybe I do actually cook more than I think I do, though considering dinner last night was four ingredients - dried pasta, frozen broccoli, mushroom alfredo sauce, crushed red pepper - and definitely not something to write home about, I'm not sure I have much to share. I don't even like alfredo sauce, so why I bought a jar of it is somewhat of a mystery.

Broccoli and Mushroom Alfredo Pasta"

This nonsense needs to stop. I'm not even sure when the last time I baked something was. Though, if I count that disastrous casserole I made myself for dinner following a trip to the second-run cinema in nearby Illinois for a showing of Men In Black 3 a couple of weeks ago, it's only been a few weeks.

College Dinner

But I digress. Or not. I'm not sure what all constitutes a digression anymore. I mean, what is the point of this if not to go out on somewhat related tangents and vent about all the food-related things in my life. Which, in all honesty, at this point might be more beverage-related. I may be going a little overboard with the whole being-21 thing. Beer is tasty. Cocktails are magical. Wine is... well, it's just not as new and exciting to me as the previous two. And the fact that Cicero's Beer School exists just makes it all even better. That, and well, ice cream martinis are a thing, so don't even try to tell me I shouldn't be enamored.

Pasta Salad

So, in reality, life just involves a lot of pasta. And pasta salad. And beer. And maybe one of these days I'll figure out exactly what I'm doing and share it with you. Actually, I sort of know what I'm doing with the pasta salad - it's wonderful, and an idea I stole from something I used to get from dining services all the time my sophomore year. But I never keep track of what I'm doing, so I'm not quite sure how to articulate the making of it.

And that failure of a casserole... well, I'm determined to make it work. And when I do, you'll probably hear more about it. But, in the mean time, just know I'm probably eating embarrassing food. Or drinking out of a metal lens mug.

Saturday, April 14, 2012

The Limes are the Key

Key Lime Curd 
Despite my lack of posts this semester, I've been writing about food more than ever. Why, you may ask? That has an easy answer - I'm taking a course on the wonderful world of food writing. But it wasn't until this week that the topic approached something I could use not only as an assignment for class, but an excuse to update this blog as well.

Sitting in class last Thursday, I was handed two limes of differing sizes. The typical Persian lime and a small, surprisingly green Key lime. And with that, I knew I had to take an approach to the assignment of writing about limes and including a recipe to use the key limes. I sent my boyfriend to the grocery store with the request to pick up a bag of key limes if they were available, and he returned with a bag, but not before calling me to ask how to tell if limes are any good. (In case you're wondering, scald - those tiny brown patches - is okay, but if they're dried up, mushy, or wrinkly, that's bad.)

It took me three days to finally decide, but when I did, I decided on something that is more of an ingredient than a final product: Key Lime Curd. And since I made that, I needed to make some scones to eat with them. And then, as a wonderfully simple and delicious dessert last night, Key Lime "Mousse," which was nothing more than a half cup of heavy cream whipped to nice soft peaks, 1/4 cup of the lime curd, and then some vigorous whisking until it was an even consistency. Now that's simple and elegant.

Key Lime Curd
Key Lime Curd
Yield: ½ cup
If key limes are not available, substitute Persian limes in this recipe.

2 large eggs
1/2 cup granulated sugar
1/3 cup freshly squeezed key lime juice, from about 9 small limes
1 tablespoon grated key lime zest

1. Bring 2 inches of water to a simmer in a saucepan. Be sure that the mixing bowl you choose to make the curd in fits in the pan without touching the bottom.

2.With a hand mixer on medium or wire whisk, whip the eggs and sugar together into pale yellow and fluffy, about 1 minute with a mixer. Whisk in lime juice and zest.
           
3. Rest the bowl over the pot of simmering water. Cook, whisking occasionally, until the mixture is thick and custard-like, about 10 to 15 minutes, or until a thermometer reads 160ºF.

4. Fill a large bowl about halfway with ice and a cup of water to make an ice bath. Once the curd is thick, remove it from the stove and rest the bowl in ice bath, stirring occasionally, until cool.

5. Use immediately, or transfer to a container to store in the refrigerator for 3-5 days.

Wednesday, February 15, 2012

The 21st Birthday Cake

Guinness and Bailey's Chocolate Layer Cake

In the United States there's this mystique surrounding the 21st birthday. And by "mystique" I mean the ability to legally purchase your own alcohol and to legally imbibe in alcoholic beverages (responsibly, of course.)

With one of my friends slyly mentioned that her 21st birthday fell on a Friday, and that she would be having a party that night, I jumped at the opportunity. "May I make your cake as a present?" I asked her enthusiastically. She looked at me like I was crazy for even thinking the response might be a no. "Of course." Then a few weeks ago I sent her a text asking for some flavor suggestions. Her response? "Chocolate, raspberry, coffee, Bailey's, something with some of those?"

Beer and Bailey's


So with it being her 21st birthday and with that list of suggestions, what's more fitting for such an occasion than yet another cake with alcohol in it, not that this cake needs to be reserved for such an event. This one combines the Guinness ChocolateCake I made last year for my St. Patrick's Day-born aunt's birthday with a take on the awesome stabilized whipped cream from Tish Boyle's The Cake Book that I previously used in abourbon chocolate cake with a rich whipped chocolate ganache filling. So maybe she didn't mention beer, but swapping raspberry for beer sounded like a good idea, and decorating the cake with some dark-chocolate covered espresso beans threw in the coffee for good measure. And then there was the Bailey's making it's appearance in both the filling and the frosting.

I'd like to think the fact that people ate so little of the cake doesn't mean that it was a failure. From all the compliments, especially from the birthday girl, I'd say it was a success. But after tacos and numerous beers, a cake this rich was just the icing on the cake - a very thin, delicious layer of icing.


Guinness and Bailey's Chocolate Layer Cake
Makes a 6" round cake
Serves 10-20

For the Guinness chocolate cake layers:
adapted from Vegetarian Times, March 2006
2/3 cup stout, room temperature (I don't know how to measure beer. It was too frothy at the top, so I ended up using 2/3 cup+ with the froth since I did a bad job pouring)
10 Tablespoons butter
1/2 cup cocoa powder
1 1/3 cups granulated sugar
1 1/3 cups all-purpose flour
1 teaspoon baking soda
1/2 teaspoon salt
1 large egg
1 large egg yolk
2/3 cup strained yogurt or sour cream
powdered sugar, for dusting

For the whipped chocolate ganache filling:
8 ounces bittersweet chocolate, chopped
2/3 cup heavy cream
2 Tablespoons Bailey’s Irish cream

For the whipped cream frosting:
1/4 cup (28 g) confectioner's (powdered) sugar
1 1/4 teaspoons cornstarch
1 1/2 cups heavy cream
1 teaspoon vanilla extract
1-2 Tablespoons Bailey's Irish cream

Chocolate covered espresso beans (optional, for decoration)
Chocolate shavings (optional, for decoration)

To make the cake layers:
Preheat oven to 350ºF. Butter a deep 6" round pan and line with buttered parchment and dust with cocoa powder.

In a heavy saucepan over medium heat, bring stout and butter to a simmer. Whisk in cocoa until smooth. Cool slightly.

In a medium bowl, whisk together flour, sugar, baking soda, and salt.

Beat egg, egg yolk, and yogurt with an electric mixer in a large bowl until smooth and blended. Add beer-chocolate mixture and beat to combine.

Beat in flour mixture for 15-30 seconds on lowest speed. Fold batter using rubber spatula until completely combined. Don't fold too much. Pour into prepared pan.

Bake about 50-60 minutes, or until tester inserted into center of cake comes out clean. Cool about 10 minutes on rack. If cake needs loosening from sides of pan, run a small knife around edges. Turn out cake onto rack (if using parchment, peel off) and let cool completely.

To make the chocolate ganache filling:
Place the chocolate in a small heatproof bowl. In a small saucepan, bring the cream to a gentle boil. Pour the cream over the chocolate and let sit for a minute. With a whisk, whisk the cream and chocolate until smooth, followed by the Bailey's. Let cool about 20 minutes or until cool, stirring occasionally. You can cool it off in an ice bath or the refrigerator to speed up the process. Once cooled, beat with a mixer for 30 seconds or until fluffy.

To make the whipped cream frosting:
In a small saucepan, whisk together the sugar, cornstarch, and 1/4 cup of the cream until smooth. Place pan over medium-high heat and bring to a boil, whisking constantly. Allow to boil for about 15 seconds. Remove the pan from the heat and let cool completely.

Once it cools, using the whisk attachment of an electric mixer, beat the remaining 1 1/4 cups of heavy cream with the vanilla extract and bourbon at medium-high speed until the cream begins to thicken and the whisk leaves a train in the cream. Add the cooled cream and cornstarch mixture and beat until stiff peaks.

To assemble:
Slice cake into three even layers.

Place the bottom layer on a cake round or a cake plate and affix with a bit of chocolate ganache. Spread the top with half of the chocolate ganache and spread a thin layer on the side to seal in crumbs. Place second layer on top and use remaining chocolate ganache and place final cake layer on top. If needed, refrigerate cake for a while before proceeding to next step if the cake seems like the layers will slide off.

Spread 2/3 of the icing on the top and sides of the cake. If using chocolate shavings, pat them on the sides of the cake now.

Place remaining icing in a pastry bag with tip or a baggie with a corner snipped off to decorate the cake.

Thursday, January 26, 2012

Cooking Carrot Cake Like It's The Seventies

Carrot Cake Cupcake (Unwrapped)


Carrot Cake is delicious and tasty, and my thoughts on this subject clearly mean I was born in the wrong decade. Except, like fashion, food fads come around. And sure, red velvet cake may be the popular one right now, but hey, carrots are way more awesome than chocolate (okay, maybe they aren't) and you still get the cream cheese frosting!


But that's beside the point. Or maybe it is the point. I'm not quite sure. What I do know, however, is that I've made this carrot cake three times in the past month. THREE. I didn't even have the recipe with me the third time. That's how easy it is! It also means I have no idea where I originally got these proportions from, since I kind of just looked for a recipe that used the ingredients that I believed went into carrot cake, and went from there.

What prompted this carrot cake madness? Gorgeous carrots of course! Except they weren't all that pretty the third time. In case you were wondering, which you probably weren't, the carrots I used in Tehran were way more orange than the ones I picked up at a Schnuck's in St. Louis last week. But regardless of just how orange the carrots are, the cakes were tasty both places. The only time the cake, in my opinion, turned out less than stellar was when I cooked it in the form of a tube cake at my grandparent's garden house. Right before I was about to pour the batter into the pan, I thought it looked off, and realized I'd forgotten the oil. Adding oil at the last step meant overstirring the cake, bringing out the sticky property of gluten - not something you want in a tender cake. But, everybody still loved the cake, or at least they pretended to. All-in-all, I ended up giving four people the recipe for this cake while I was there. It'll be interesting to find out if any of them ever actually make it.

Carrot Cake Cupcake
Simple Carrot Cake
Note: This cake can make 2 9" cake rounds, or probably somewhere around 24 cupcakes, or a bundt cake, or a sheet cake. The cooking instructions below are for cupcakes.

2 cups all-purpose flour
2 teaspoons baking soda
2 teaspoons cinnamon
1 teaspoon ground ginger (alternately, you can use 2 teaspoons of fresh grated ginger)
1/2 teaspoon ground nutmeg
1/2 teaspoon salt
2 cups granulated sugar
4 eggs
1 cup canola oil
4 cups grated carrot (about 5-6 average-sized carrots)
1 cup raisins (or chopped, toasted walnuts), optional


Preheat the oven to 350ºF (180ºC). Line a cupcake pan with 12 liners. If you have 2 pans, line both, otherwise you'll need to bake them in two batches.

In a small bowl, whisk together the all-purpose flour, baking soda, cinnamon, ginger, nutmeg, and salt. Set aside.

In a large bowl, whisk together the sugar and eggs until pale and thick. Whisk in the canola oil.

Add the flour mixture to the wet ingredients, and with a spatula or wooden spoon, stir until just almost combined. Add the carrots and raisins or walnuts, if using and stir until all the flour is moistened.

Fill the lined muffin cups about 2/3 full of batter. Bake for 15-20 minutes, or until the tops spring back when lightly touched. Remove from oven and let cool for 5 minutes before transferring to a wire rack to cool completely.

Once cool you can top them with cream cheese frosting, if desired. See recipe below or use your favorite cream cheese frosting recipe.

Cream Cheese Frosting

8 ounces (1 package) cream cheese, softened
4 ounces (1 stick) butter, softened
1/2 teaspoon salt
1 teaspoon vanilla extract
1 cup powder sugar, or to taste

Beat together cream cheese and butter until smooth and fluffy. Beat in salt and vanilla extract. Slowly add powdered sugar and beat to incorporate.

Saturday, November 19, 2011

Taco Time!

Chorizo Tacos

The problem with feeding just myself is that I frequently eat the same thing over and over and over again, with tiny variations. (The other problem is that since I share my fridge with three other people, I tend to lose my food to the depths of the fridge as one of them really likes to shop and stock up on things.) But somehow, by the time I ran out of Trader Joe's Soy Chorizo, I still wasn't sick of these. Maybe because they're super quick to make, and incredibly comforting. Maybe I have a strange idea of comfort food, but I'm okay with that. At least I've moved past my fish and chips phase of last month.

But in case you're wondering how I do it, here you go.

They key is the chorizo (onions, bell pepper, jalepeno, chorizo, extra chili powder.) Just finely chop the onions, bell pepper (I used orange), and jalepeno and saute them until soft. Add the chorizo and some extra chili powder, and heat through. Tasty and simple. Top with whatever you have on hand.

In a smaller pan, I heat up corn tortillas over medium-high heat, and then transfer them to a plate where I top them with some of the chorizo filling, and then depending on my mood, some of the following: salsa, cheese, cilantro, sour cream (I never actually choose this one), eggs.

Maybe it's not the healthiest, but it sure is tasty.

Monday, October 24, 2011

Gooey Butter Cake Cookies

Gooey Butter Cake Cookies

It's been over a month since I've last posted, and it's not for a lack of cooking. Or photographing my food. It's just that whole problem of either having a good recipe or having a good photo, but rarely both. And then being pressed for time. Or writing half a post and never posting it because by the time I finish it, I've forgotten what I did if it's something I came up with, or if it's something I adapted, I can't find the original recipe and/or forgot my modifications.

But I'm not posting now to tell you all the things I haven't done, but to tell you what I have done. To remind myself of what I've done, I made an album on flickr of food I've made at school. Sure, it dates back to stuff from freshman year, but now it's organized! So if you see anything there that looks tasty and lacks a link back to this blog, then pester me and I can try to figure it out and post about it! Most of them say coming soon, but that might be a lie. I may never blog them because I'm forgetful (and, in the case of this cake, I found it underwhelming.)

And then, when I'm not cooking or baking (which definitely doesn't happen enough) I'm either in class, watching The OC with my roommate, studying, writing papers, or doing stuff for My Car And My Guitar or something. I'm not going to provide you with some exhaustive list you don't want, because that's just less time I can spend talking about these cookies. Which are an abomination by the way.
Gooey Butter Cake Cookies


Yeah. See those ingredients? I seriously can't believe I made them. Not only that I made them, but that I've made them four times. Or maybe it's five. They're easy, affordable, and comforting. A twist on that St. Louis classic, Gooey Butter Cake, in cookie form! And they're not too expensive or anything, especially when cake mix is on sale and you can get it for $1 or less, and then the 75 cent stick of butter, the 20 cent egg, and the $2 cream cheese. I keep forgetting about powdered sugar, but it's like 45 cents of that probable. Five bucks and an hour of my time (including clean up) isn't too bad for around 3-4 dozen cookies!

And okay, I forgot some ingredients in the picture above. So here's the correction:
Gooey Butter Cake Cookies

But I never use the vanilla anyway.

But, like I said: Easy. Simple. Quick. Crowd-pleasing. So what are you waiting for?

Gooey Butter Cake Cookies
Makes 3-4 dozen cookies

1 box yellow cake mix
1 package (8 oz) cream cheese
1 stick (4 oz) butter, at room temperature
1 large egg
1/3 cup powdered sugar

Preheat oven to 350ºF and line 2-3 cookie sheets (or just bake in batches!) In a large bowl, beat together cream cheese and butter until smooth. Beat in egg. With a spatula or wooden spoon, stir in the cake mix. It will be very thick, and may take a while.

Gooey Butter Cake CookiesGooey Butter Cake Cookies

Pour powdered sugar into a small bowl. Roll heaping teaspoons of dough into balls and coat one side with powdered sugar. Place on baking sheet face up. Flatten slightly.
Gooey Butter Cake Cookies

Bake cookies for 7-10 minutes, or until bottoms are browned and tops are crackly and dry. Enjoy!

Monday, October 17, 2011

Omelet for One

Sunday Morning Breakfast


If there's one thing I love about having a kitchen, it's being able to eat breakfast on my own schedule on the weekends. I don't have to worry about carrying pans and food to a dorm kitchen to cook, eat in a too large room by myself, and then immediately clean up. There's nothing relaxing about that, and that's something breakfast should be on a weekend morning.

With two of my roommates out of town, and another not allowed to eat until after her blood work, I took my time and made myself a nice breakfast. While making my dinner the night before, I'd cubed some potatoes and sauteed some half-frozen mushrooms that had stuck to the side of our fridge with garlic. I chopped up some onions, threw them in a pan, and cooked them up with potatoes. Having recently learned how to cook potatoes, I'm still really excited by this. Unfortunately, I'm not sure what I do. I think I just poke them until I think they're done. Meanwhile, I reheated the mushrooms, adding in some spinach with them.

In a small bowl I beat together my eggs with some milk, and poured it into a nice small pan, lifting the egg up as it cooked to let the runny egg flow underneath. Once it seemed almost cooked, I added the mushrooms, spinach, and some cheese, put a lid over the pan for about 30 seconds to let it finish cooking. I removed the lid, folded over the omelet, and slid it onto my plate along with some potatoes. Then it was time for Sunday Morning. Bon Appetit!

Sunday, September 11, 2011

Eggplant Day

Eggplant

Do you have those foods that at one point you absolutely detested and would avoid any dish at the mention of their name? Yeah, me too. But the number's gone down drastically in the past ten years. But there was a point in my life when, unless I didn't know it had eggplant in it, or it was nice and creamy like kashk-e bademjan, I wouldn't touch it. Just the thought of it grossed me out. It was gross and bitter with a weird texture.

Clearly, my opinion on eggplant has changed. I get super excited whenever my dad roasts eggplant on the grill knowing it means some sort of delicious garlicky eggplant dip is in my future. My mouth waters at the mention of fresh eggplants from my aunt's garden. And at the sight of gorgeous graffiti eggplant from a nearby farm at the grocery store for 99 cents a pound, I can't help but grab a gorgeous globe, just thinking of what I can do with it.

And then, I find out, that like me of the past, my roommates all detest eggplant. One will only touch it if it's deliciously fragrant and disguised, which isn't something I've mastered, and another is allergic, which is an acceptable excuse. Leaving me to come up with something easy and simple for one. And with my failure of planning while at the grocery store, I didn't have much to work with. I thought about making a pan-fried eggplant sandwich with carmelized onions, and somehow that turned into a really ugly, but tasty, dish. Layers of thinly sliced eggplant and tomatoes topped with garlicky sauteed onions and fresh mozzarella. Yum!

Dinner

Monday, August 29, 2011

New School Year, New Post

Spicy Double-Chocolate Mango Cookies

It seems that somehow this gets more neglected over the summer. Summer, when in theory I have abundant free time, easy access to groceries and a kitchen, and willing test subjects in the form of my family. Unfortunately, those three things don't quite add up, and it's difficult to cook and take pictures whilst spending 28 hours a week commuting (and out of that, about 100 minutes a day actually on various trains and buses, the rest of the time was spent standing still at stops or walking. I now have a love/hate relationship with the CTA.) And in addition to that, I'm also one-half of My Car And My Guitar, a music news/reviews site.


But now that I'm back at school, it seems for the first time since the week I left I have something to post, following in what seems to now be a tradition (the mini gluten-free cupcakes from last year, and the Peanut Butter Chocolate Chip Cookies from the first Friday of my freshman year). And these aren't even the first thing I've made since I've been back. My first morning here, I borrowed my roommate's skillet and made a nice big (and bland) spinach omelet for three, and later that evening whipped up a batch of chocolate crinkles, with delicious smells wafting through our spacious apartment.

But last night, after being sadly (and predictably) disappointed by the VMAs (and the PDA in the living room), I opted to bake something interesting and bloggable. And with that, I present to you Spicy Double-Chocolate Mango Cookies (if you can come up with a better name, please, let me know.)

These tasty cookies pretty much require a glass of milk or your preferred equivalent. Rich and chewy, strong and spicy, they pretty much come on as a full-force attack. And didn't lead anyone to question my sanity before biting in as with those corn brownies I made freshman year.

So if you find yourself with a tiny bit of time on your hand, a Trader Joe's nearby (or time to put sugar, cayenne, and paprika on your mangoes), a warm oven, and a craving for something a little spicy, give these cookies a try.


Spicy Double-Chocolate Mango Cookies

Spicy Double-Chocolate Mango Cookies
Makes about 3 dozen cookies

1/2 cup butter, softened
1/4 cup + 2 Tablespoons granulated sugar
1/4 cup + 2 Tablespoons packed brown sugar
1/2 teaspoon baking soda
1/4 teaspoon cinnamon
1 egg
1 1/2 ounces unsweetened chocolate, melted and cooled
1 cup all-purpose flour
4 ounces chili-spiced dried mango, chopped
3 ounces milk chocolate, chopped or 1/2 cup milk chocolate chips


Preheat he oven to 350ºF. Line 2-3 baking sheets with silicone baking mats or parchment paper.

In a large mixing bowl beat butter, granulated sugar, brown sugar, baking soda, and cinnamon until well combined, scraping sides of bowl occasionally. Beat in eggs until combined. Beat in melted unsweetened chocolate.

With a spatula or wooden spoon, stir in flour, followed by chopped dried mango and milk chocolate.

Place spoonfuls (I use a 2tsp. scoop) of dough 2 inches apart on prepared pans. Bake in oven for about 10 minutes. Let cool slightly and serve, or transfer to wire cooling rack and let cool completely before storing.


Sunday, April 03, 2011

There's a pie in my cupcake!

Surprise Cupcakes

Happy April! I'm a little belated with posting this, given that it's no longer April 1st, but they're fun for a party, and if decorated, I'm sure they'd actually be pretty. My butter just wasn't being nice, and neither was the microwave, so I opted out of frosting these cupcakes.

Over the summer, my friend texted me a picture of a chocolate cupcake with white frosting on top and a mini cherry pie in the middle that he saw online. I was intrigued, and told him I was tempted to try to make them. His birthday was a couple of weeks ago, and since it was midterms week, I decided to try to cut down on the weight of my groceries and the amount of time I'd spend on it, even if that meant sacrificing quality, so he could have a cupcake with a tiny pie in the center.

They're pretty simple to make, though because of the two steps, a bit more time consuming that just making plain chocolate cupcakes from a box, but only by about 20 minutes or so.

Surprise Cupcakes
Surprise Cupcakes
makes 12 surprise cupcakes, but can easily be stretched to make more

1 box chocolate cake mix (and the oil, eggs, and water the recipe calls for)
1 package refrigerated pie dough for a double crust pie
a can of cherry pie filling (you'll need about 2/3 cup or so of filling, maybe less)
frosting of choice, optional

Preheat oven to 450ºF. Cut pie dough into 12 2" circles, and press into a mini muffin pan. Fill each with a spoonful of cherry pie dough. Cut out 12 1" circles from remaining pie dough, and top each pie with the dough, pressing edges together. Bake for about 8-10 minutes, or until edges are golden. Remove from oven and let cool until you can remove them from the pan, about 5 minutes. Decrease oven temperature to 350F.

Meanwhile, prepare chocolate cake mix as directed.* Line a muffin pan with 12 liners, and scoop a heaping tablespoon of batter into each one. Place a mini pie in each muffin cop, and top with another heaping tablespoon of batter so that they are completely covered. Bake in 350ºF oven for about 15-20 minutes, or until tops are dry and spring back when pressed lightly. Remove from oven. Cool slightly in pan, and then transfer to a wire rack to cool completely. Ice or enjoy as is!

• Since it should make enough for 24 cupcakes, you'll have extra batter. Alternately, you can buy/make more pie dough, or make more mini pies, and make that number of the cupcakes as described enough (my guess is around 30 total) or just make extra plain cupcakes with the remaining batter. A package of pie dough should have enough crust for about 14-16 mini pies. My guess is that a small can of cherry pie filling will probably make about 20 or so pies.

Friday, February 18, 2011

The Gluten-Free Layer Cake

Peach Schnapps Layer Cake

Last semester while talking to one of my roommates, it was discovered that she likes peach schnapps. She really likes peach schnapps, and, it's not something that makes her sick. Well, in moderation. I'm sure if she got a little too excited and drank a bit too much, she wouldn't feel so great. But since schnapps happen to be gluten free, she can imbibe in the candy-sweet alcohol as long as nobody's carding her.

It's not a secret that I don't shy away from baking, cooking, or lowering freezing points with alcohol, so it shouldn't come as a surprise that I decided to challenge myself to make a gluten-free cake incorporating the sickeningly sweet smelling schnapps.

Unfortunately, she never did get to try the cake that was originally imagined for her birthday, but all the gluten-tolerant tasters thought it was quite tasty. One even remarked, "Is this really gluten-free? It's really good." And, unless my checking all the labels failed me, it really is!

Making this cake was not without some slight hitches, mostly because of my lack of sleep and attention. I took all the ingredients out to bake the cake layers at 7pm last Friday night, after sleeping a mere 2 and a half hours in the previous 36. I failed to notice that I was looking at a recipe that made 80 mini cupcakes. A 6" cake does not require 4 pounds of batter, which I think is what I ended up with. I started divying up the batter by weight, hoping to make equal layers, and when the first one came out of the oven, I realized if I used more than just that for the cake, I'd end up with a leaning tower. I baked off a dozen cupcakes and a slightly smaller cake layer that I ended up omitting from the cake, deciding to go with a slightly shorter cake (If you follow the recipe below, yours may end up a bit taller than pictures from this recipe, but no worries! There's just enough frosting to take care of that!) Plus, it never hurts to have an extra 12 ounces of cake lying around. With the addition of some whipped cream and frozen fruit, it can be turned into a tasty (but extremely unphotogenic) mango trifle later in the week!

Peach Schnapps Layer Cake
Peach Schnapps Layer Cake That Just So Happens To Be Gluten-Free
makes 1 6" 3 layer cake

For cake layers:
1 cups (200 g) granulated sugar
2 large eggs
1 1/4 cups gluten-free rice flour all-purpose mix (I used 200 grams of Gluten Free Pantry All Purpose Flour)
1/4 teaspoon salt
1 1/2 teaspoons baking powder
1/2 teaspoon xanthan gum
1/2 cup canola oil
1/2 cup milk
*add a teaspoon of vanilla extract, especially if you want to skip out on the schnapps

2/3 cup peach preserves

For peach schnapps syrup:
1/4 cup (50 g) sugar
1/2 cup water
2 Tablespoons peach schnapps

For peachy buttercream:
1 cup/2 sticks unsalted butter, softened
2 1/2 cups powdered sugar
pinch salt
1/4 cup peach preserves


To prepare cake layers:
Preheat oven to 350ºF. Grease a 6" round cake pan (mine's 3" deep).

Beat sugar and eggs in large bowl of electric mixer at medium speed for one minute. Add flour, salt, baking powder, xanthan gum, oil, milk, and vanilla and beat at medium speed for about a minute, or until batter is smooth.

Scoop batter in prepared cake pan. Place pan in center of oven and bake for about 45 minutes or until top springs back when lightly touched or a toothpick in the center comes out with only a crumb or two. Remove from oven and cool on a wire rack for a few minutes, remove from pan and cool completely.

To prepare sugar syrup:
Heat water and sugar in a small saucepan, stirring, until sugar is completely dissolved. Remove from heat and let cool. Stir in schnapps.

To prepare frosting:
Place butter in a medium bowl and beat until fluffy. Add powdered sugar and salt and beat until smooth. Beat in peach jam. (If planning on piping frosting, you may want to set aside some frosting before adding jam to prevent getting clumps stuck in your bag.)


To assemble cake:
Level the top of the cake. Slice cake into three layers. Place the base of the cake on a cake plate or large plate, sliced side up. Brush with syrup. Spread 1/3 cup peach preserves over cake layer, and top with another layer of cake. Brush with syrup and spread remaining 1/3 cup preach preserves over the layer. Top with the remaining layer of cake and brush entire cake with remaining syrup.

Scoop about 1 cup of frosting on the top of the cake and spread over the top and sides of cake, adding more frosting as necessary. Smooth sides and top, and, if desired, pipe designs with remaining buttercream.

Store in refrigerator for up to 2 or 3 days. Take out about 20 minutes before eating or it'll be too cold and not taste as awesome.

Monday, February 14, 2011

Truffles for Your Valentine

Chocolate Raspberry Cream Cheese Truffles


It was approaching seven at night, and upon receiving a text from my friend about receiving a box of chocolates, I realized that it was Valentine's Day. And with Valentine's Day comes an excuse to eat chocolate whether you're single or otherwise preoccupied.

The dessert cases here at school had heart and red-themed treats within them, but if I was going to enjoy something chocolate or red, it was going to be on my own terms, and while celebrating the nice break from schoolwork. I was going to make truffles a week or so ago and bought the ingredients, and decided, what's a better thing to treat myself to on Valentine's Day?

Raspberry Jam


I decided to add a festive twist, and with that, I cranked up the Taylor Swift, whipped out the cream cheese, chocolate, and raspberry preserves, and while covering the table and microwave in chocolate, made these yummy little morsels. I wiped the chocolate off my face, and then proceeded to wander around and share them with a grin upon my face.


Chocolate Raspberry Cream Cheese Truffles
Raspberry Chocolate Cream Cheese Truffles
makes about 36

1 8 oz. package cream cheese or neufchatel, softened
8 ounces semi-sweet chocolate, melted
1/3 cup raspberry preserves
10-12 ounces semi-sweet chocolate (melted but later on)
decorations (i.e. sprinkles, chopped nuts, etc), optional

Beat the cream cheese until fluffy and beat in the chocolate and raspberry preserves. Chill until firm enough to handle and then scoop and shape teaspoonfulls into balls.

Chill for half an hour or so, and then dip into melted chocolate and place on a sheet of wax paper or silicone mat (and top with sprinkles or something if desired).

Refrigerate for a few hours until chocolate is set.

Enjoy!

Wednesday, February 09, 2011

An Alternate Stir Fry

refried stir fry


Being at school, it's rare that I make my own dinner, unless you count the chips and leftover bean dip from the super bowl that I called "dinner" Monday night. Or there was that time I had brownies for dinner last semester...

Neither of those really qualify as dinner. However, repurposing leftovers to make something similar, but different, counts. And that's exactly what I'd been planning to do as soon as I realized that there was no way I would finish my original stir fry from dining services here.

The leftover stir fry (brown rice with some assorted veggies, tofu (that I'd eaten all of), and a sesame ginger sauce) served as my base. It was kind of old, so I made sure to heat it really well, meaning I brought it practically to a boil, which was probably terrible for the integrity of the vegetables, but I really don't want to die.

I added some torn up spinach (leftover from a tuna fish sandwich I made a week or two ago. I really need to work on using things quicker) and a bit of chili garlic sauce. I made a well in the center of the pan, added a bit of sesame oil, and cracked two eggs into the well, breaking up the yolks with my spatula. I let them cook a bit and then stirred everything together and left it in the pan as I washed some dishes, broke it all up so it wouldn't be a gigantic egg and rice patty, washed out the pan, and then came back up to my room to enjoy it as I did some reading for my environmental psychology class.

For the effort, I'd say it was quick, easy, tasty, and affordable. Unlike the cake I plan on attempting this weekend. Let's just say I should have a peachy time.

Wednesday, December 01, 2010

"Why aren't there walnuts in these brownies?"

Ingredients for Oat Brownies

Because they have oats, Granma.


Right before heading home for Thanksgiving Break, I realized I had half a dozen eggs in my fridge that were going to go bad. I could do the easy thing: borrow a skillet and make scrambled eggs for me and a couple other people for dinner. Or I could bake 6 eggs worth of things. There was like a pound of butter in the fridge, so it wasn't like I had to go to the store or anything like that.

I wanted to try something new, and since I have a giant container of oats (and by giant, I mean a measly 2lb container) I decided to try out Bruce Weinsten's Oat Brownies from The Ultimate Brownie Book. I didn't vary much up, and I think next time, I might add some cinnamon to these, though maybe that's just because I really like cinnamon. And because I'm running out of vanilla extract.

They were fudgy, chewy, and crispy, all at the same time, thanks to the oats. He calls for toasted oats, but I find that when fighting over a kitchen with a bunch of other people, that's not really possible. When I finally did get control over the oven, it wasn't all easy sailing, but that may have made them tastier. The fact that the oven kept getting opened and closed (someone needed to make toast while I was using the oven), and all the rapping caused the brownies to collapse into a wonderful chewy goodness. (If you haven't noticed, I'm a fan of chewy brownies over cake-like ones.)

Granma's the only person who seemed disappointed by these brownies, but I think that's because she was expecting these brownies. Maybe one day I'll post the 9x9 version of that recipe... Winter break?


Decorated Oat Brownie
Oat Brownies
from Bruce Weinstein's The Ultimate Brownie Book
makes a 9-inch square pan of brownies (which is sixteen to the average person)

1/2 cup (63 grams) all-purpose flour
1/2 teaspoon baking powder
1/2 teaspoon salt
1 stick (4 ounces/113 grams) unsalted butter
2 ounces (66g) semisweet chocolate, chopped (or chocolate chips in a pinch)
2 ounces (66g) unsweetened chocolate, chopped
1 cup (218 g) packed brown sugar
1/2 cup (100 g) granulated sugar
2 large eggs, at room temperature
2 teaspoons vanilla extract
1 1/2 cups (120 g) rolled oats (he recommends toasting them for 5-7 minutes, I omitted this step)

Position oven rack in lower third of oven. Preheat oven to 350ºF. Butter and flour/line with greased foil/whatever your preferred method of "preparing" a 9 in. square pan; set aside.

Whisk together the flour, baking powder, and salt. Set aside.

Place butter and both kinds of chocolate in a microwave-safe bowl. Microwave in 30-second intervals, stirring between, until the chocolate is melted and stir until smooth and all evenly melted. Set aside to cool. (Or do this over a double boiler, removing from heat as soon as chocolate is melted. Butter will finish melting as you stir.)

In a large bowl, beat the brown sugar, granulated sugar, and eggs with an electric mixer (or, if you're working on your arms, with a whisk for about 6 minutes) until sugar has dissolved and the mixture is thick and creamy. Beat in vanilla and cooled chocolate mixture. Beat until smooth and uniform, scraping down the sides of the bowl as necessary.

With a spatula or wooden spoon, stir in the oats. Then fold in the four mixture until just incorporated. Don't beat up your brownie batter. Pour the batter into prepared pan and gently spread to corners.

Bake for 20 minutes or until top is dry and a toothpick comes out with just a few moist crumbs.

Set aside to cool on a wire rack for a while. Cut into desires number of pieces and enjoy!

Sunday, August 29, 2010

A Friendly Hello

IMG_5627

I'm back at school now, as anticipated in my previous post. I have my own room, with paper thin walls, a new set of metro shelving around my desk displaying my bowls and pans to tempt me from my studies (and because I have trouble reaching the shelf in my closet), and three very sweet suitemates, one of whom has a whole host of food sensitivities.

But I'm not one to purposely exclude people, especially not in the first few days back, so I offered to look up some recipes and make some gluten-free cupcakes that we could deliver to our fellow residents of the building, and that she could enjoy.

So together (though it was mostly her, I just did the grocery shopping and provided the materials and recipe printout) we made vanilla cupcakes, and then, along with our other two suite mates, wandered the halls of our residence hall, meeting new people. Except I don't really remember anyone I met yesterday, which isn't a good thing... But hopefully people remember my suite mate's name, because she's running for res college president. So shh... it's too soon to campaign yet.

IMG_5615
Gluten-free Vanilla Cupcakes
adapted from Cupcakes Take The Cake
makes around 80 mini cupcakes

2 cups (400 g) granulated sugar
4 large eggs
2 1/2 cups gluten-free rice flour all-purpose mix (I used 400 grams of Gluten Free Pantry All Purpose Flour)
1/2 teaspoon salt
1 Tablespoon baking powder
1 teaspoon xanthan gum
1 cup canola oil
1 cup milk
2 teaspoons pure vanilla extract
2 cups of favorite frosting (if not homemade, make sure it's gluten free)
Preheat oven to 350ºF.

Place cupcake liners in mini-muffin pans. You probably don't own enough pans, so you'll probably need to bake the muffins in batches.

Beat sugar and eggs in large bowl of electric mixer at medium speed for one minute. Add flour, salt, baking powder, xanthan gum, oil, milk, and vanilla and beat at medium speed for about a minute, or until batter is smooth.

Scoop batter in prepared baking pan. Place pans in center of oven (or in top and bottom thirds and rotate halfway through baking(, and bake for about 15 minutes or until top springs back when lightly touched. Remove from oven and cool on a wire rack for a few minutes, remove from pan and cool completely before icing with frosting of your choice.

Share and enjoy!

Saturday, May 15, 2010

The KFC Double Down Adventure: By Ashleigh

This is a stick-up! I want everyone to put their forks in the air slowly and hand over your good taste.

fb-4171

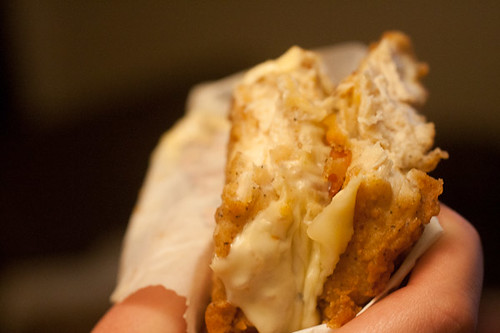
Ah, so this blog is a usually bastion of fine desserts and food, but here to bring some REAL CLASS is I, the ubiquitous Ashleigh, bringing you the wonders of the ultra-classy KFC Double Down. But really, this entry will be about the ridiculous lengths taken to acquire this gold-standard of fast food ridiculosity and how the DD is really just the culmination of a thousand of years of globalized oppression brought on by the…ahem. Nothing to see here! Moving on.

fb-4115
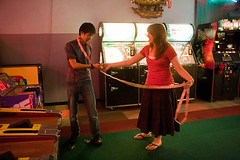
It all started with some ITG (In the Groove, the slightly more difficult and apparently more awesome version of DDR). No, actually, it started with Colin picking my friends (Mar and Agent Tsai) and me up from the 40, but really, who needs to know that? (Except now you know all of the characters in this little drama, see that was clevar.) So, we went to the arcade, owned some noobs at Ski Ball, got owned at ITG (except for Colin.) and decided to leave when the locals decided to cut in line and take off their shirts BEFORE playing.

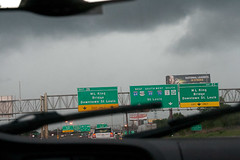
I never thought I’d be thankful for douches but…I have a new found appreciation for them, as Axe-drenched tornado warnings. No sooner than we had buckled our seat-belts, the tornado sirens went off. Me, being a hardened Kansas veteran of many severe storms, determined, since the sky was not yet green, that we should go find a KFC anyway and watch the radar as we went. It was a great idea, and was working until Susan (the GPS) started taking us right into the middle of the storm. And then the sky turned green. And then we made a U-turn. Colin suggested that we go home and so Mar pushed the correct buttons on the GPS and we were off. As this point, my brain switched into full storm-excitement mode aka OMG I LOVE STORMS OMGOMGOMG THIS IS SO AWESOME mode ™. I was just staring at the sky, taunting my friends back home via text (who were super jealous), and occasionally offering reassurances to the team (yeah, we’re a team now). So, I didn’t really watch where we were going. I did start paying attention when we started crossing the river.

Me: “Hey Colin. I thought you lived near the university.”
Colin: “yeah, I do. Why?”
Me: “Uhm, we’re crossing the river.”
Colin: “#$@!”
Me: “Hey Mariam, did you press the ‘home’ button on Susan?”
Mar: “Yessss…”
Me: “Well, Colin’s from New Hampshire.”
Mar & AT: “…”

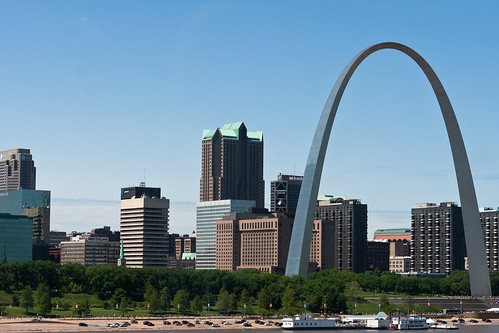
So they say everything happens for a reason, and in this case, by getting turned around in ghetto East St. Louis, we managed to avoid the worst of the storm AKA death by tornado. By the time we made it back across town, the sun was shining, the freeway was slightly flooded, and KFC was looking fantastic.

fb-4142

Susan decided not to be a jerk and guided us to the objective of the day. Too exhausted to brave the unsanitary confines of the restaurant, we opted for the drive-thru and the relative comfort of the apartment, which brings me to the food part of this blog.

fb-4147

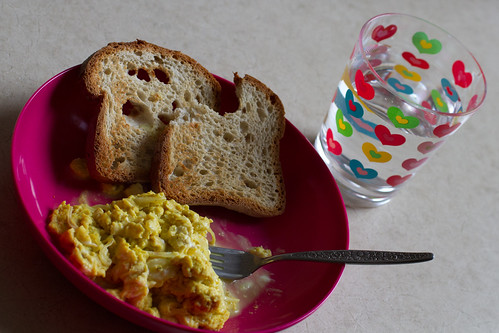
The KFC Double Down, as you might know, is a “bunless” sandwich that consists of cheese, “Colonel Sauce” (mayonnaise, for real), and two pieces of bacon between two pieces of fried chicken. I’m probably going to shock the whole blogosphere by saying this, but it’s really not that gross. Honestly, if you slapped the whole thing between two buns, we’d have a double chicken burger with bacon. Which IS disgustingly disgusting, but it’s not the harbinger of doom that everyone’s been freaking out about. The most horrible thing about it was that it was incredibly salty, just like KFC’s fried chicken. I was genuinely disappointed in the lack of greasy-monstrosityness. As far as taste goes, it was very salty, so it was “good,” meaning that the four of us ate it rather quickly and guiltily. Sadly, the bacon and sauce were buried between the chicken breasts, and only a hint of cheese managed to squeeze through. In a way, this blog entry is like the Double Down, in that the two anecdotes that encapsulate the point of the entry are greater and more delicious than the objective.


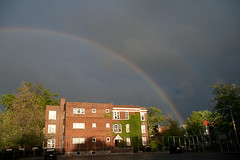
We couldn’t subsist on a few bites of fried chicken alone after a long day of being storm chased, so we decided to take Agent Tsai (a Canadian) to Steak ‘n Shake, because “they don’t have those in Canada.” So, battle-scarred and hungry, we piled into the Subaru and told Susan to take us to the nearest SnS (but not before we gawked at a full double-bow rainbow for five minutes). Well, Susan decided to be a complete wanker and direct us to a Steak ‘n Shake that DID NOT EXIST. It was like the Twilight Zone, but unlike the Twilight Zone, we didn’t receive a somewhat twisted moral lesson or become trapped in some sort of inter-dimensional rift, I just yelled at the GPS and we found one that actually existed. Not quite as awesome, but I digress. Steak ‘n Shake, was well, steak(ish) for the half that couldn’t have a shake. The other half had shakes, but no steak. Did that just blow your mind? Because it really shouldn’t. I had the Frisco melt, which was a SNS burger on sourdough with “Frisco sauce” (just a crude imitation of the perfection that is In-N-Out’s Special Sauce). It was pretty good, although I really wasn’t paying attention to it; I was really hungry, and jealous of Mar’s mocha/vanilla shake. (Curse you lactose intolerance!) I think the ice cube sculptures were the best part of the meal…no, our waiter aka “Robo-man” was the best part. I think he might have been lobotomized. Because of lactose-challenged status of half of our group, we decided to seek dessert elsewhere.

fb-4176fb-4184

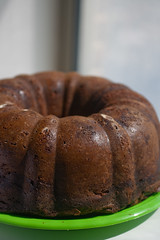
Well, yours truly had a “brilliant” idea that we should procure a dessert-only reservation at Harvest. A couple of older, more knowledgeable college students had informed me that Harvest had excellent desserts, and had been there in casual wear. So, running with that information, we made reservations (that should have been our first clue) and finally made it there after becoming lost AGAIN. (Incidentally, Susan was grounded for a few weeks.) So, the amazing desserts thing was correct, but the casual wear? Let’s just add this experience to the awkward-things-Ashleigh-has-dragged-her-friends-into list. However, our waitress was wonderful, courteous, and kind. She suggested the bread pudding which everyone, except for Agent Tsai, ordered. I am not exaggerating when I say that this dessert was the best thing I’ve eaten in St. Louis, and possibly the best dessert I’ve ever had. It was warm, not too chewy, and the cream complimented the sweet vanilla bourbon sauce perfectly; the currants were an added bonus. It was a golden and glorious ending to our gastronomic adventure (that was only supposed to last a few hours by the way). Unfortunately, there are no photos of this wonderful dish, as we were all too cowed to whip out our cameras.

So thus ends my tale of April 24, 2010, despite its supreme ridiculousness, probably one of the best days of my freshman year. There’s something wonderfully relieving, de-stressing, and dare I say it, enjoyable about engaging in a good bout of insanity. (yeah, I just screwed up that parallelism. English teachers the world over just face-palmed) Many thanks to Colin for providing transportation and enabling the whole adventure, to Mar for letting me hijack this blog, and to Agent Tsai, for being a bulwark of stoicism in the midst of the storm. (aka silently panicking in the backseat. Well, to be fair, Mar was assisting, and Colin was “passive-aggressively” panicking, although I suppose he had a reason, being the driver and all.)

FUN FACT: This blog entry is longer than my last music history essay over 17th-century madrigals. Mar, this is how much I love you.

Thursday, May 06, 2010

an idea a month in the making

IMG_4275

So on April Fool's Day, I met my friend for dinner and he brought up the idea of putting nutella into brownies. Much to his surprise, I told him that I'd seen recipes for such a thing before, and we planned to meet again to bake some soon.

Soon is a relative term, and the semester is now almost over, and it wasn't until reading week that we were able to find a mutually agreeable time to bake the brownies. Which aren't just nutella brownies, they're nutella cheesecake brownies from alpine berry.


Her recipe is surprisingly simple, and extraordinarily rich. I didn't quite follow it (I'm sorry, but did I really need to unwrap that third stick of butter? The answer: no), but the brownies turned out anyway.

However, a week ago I made more sweet corn brownies, and my pan disappeared. I had to borrow a pan to make these brownies, and when I get home, I'll have to replace my pan. I'm not looking forward to that - I'm super indecisive, it took me forever to pick out a bundt cake. But I'll be optimistic, I have about 89 more hours for it to turn up before I completely lose hope.

And, it's not the end of the world. It's just a pan.

IMG_4274
Nutella Brownie Cheesecake
adapted from alpine berry
Makes a 9x13 pan of very fudgy brownies

Brownie layer:
2 sticks (8 ounces) unsalted butter, melted and cooled
2/3 cup Nutella (chocolate-hazelnut spread)
4 large eggs
2 cups granulated sugar
2 cups all-purpose flour
1/2 cup natural cocoa powder

Cheesecake layer:
8 ounces cream cheese, softened
3 tablespoons granulated sugar
2 large eggs
1/3 cup Nutella

Preheat oven to 325ºF. Line 9x13 inch baking pan with parchment or greased aluminum foil.

First, make the brownie layer:
Combine butter, Nutella, eggs, and sugar in a large bowl and mix well. Stir in flour and cocoa powder and mix until combined. Pour batter into prepared pan and spread evenly. Set aside.

For the cheesecake layer, beat together the cream cheese and sugar. Beat in the eggs and Nutella until well combined.* Pour over brownie batter in pan.

Bake until the cheesecake layer looks set, about 50 minutes. Allow brownies to cool completely in the pan before cutting. If storing, keep refrigerated.

*I originally combined all the ingredients for the cheesecake layer together at once, but it was a little lumpy. Hopefully this will solve that problem.

Saturday, April 10, 2010

Well, I could've been at a frat, but I decided to bake a cake instead

IMG_3946

I've been throwing out bananas a lot lately. It's really a shame. On top of it being a waste of perfectly good bananas, it's also a waste of money. Usually I have the foresight to throw ripe bananas into the freezer, but in falsely believing that "I'll just use them tomorrow," they get to be too black to even consider saving.

After a delicious three-course meal last night, courtesy of a very friendly family whose daughter is trying to decide where to go to school next year, my roommate and I returned to our room a bit after ten. And I saw the bananas.

I was going to make banana cookies, but there were three bananas. And I don't really have the patience to make a triple batch of cookies by myself. All that scooping would get old awfully fast.

So I decided I'd use my bundt pan, and some of the bananas already in the freezer. I picked out a recipe, started to defrost 5 bananas, and made a grocery list of things I could get on campus (plain yogurt, however, is not a possibility, but sour cream is!), and got to work. Well, sort of. Along the way, I was given the offer of going to a fraternity party, which has been on my to-do list for a while, but those bananas were calling my name. It'll just have to wait until another night.

And this cake is tasty, so I'd say worth the alone time. Granted, someone walked in on me dancing around the kitchen to All Time Low at 2 in the morning in an effort to keep myself awake, but hey, it was the awesome smell wafting down the hall that attracted them, so I'd say that's always a good sign.


IMG_3932
Nutella-Swirled Banana Cake
heavily based on this
makes 1 large bundt

4 cups all-purpose flour
1 1/2 teaspoons baking soda
1 teaspoon salt
1/2 cup (1 stick) unsalted butter, softened
2 cups granulated sugar
4 large eggs
2 1/2 cups mashed bananas (about 6-8 bananas)
1 cup (8 oz container) sour cream
1 1/2 cups chocolate hazelnut spread (Nutella)

Preheat oven to 350ºF. Grease and flour a 12-cup bundt pan, set aside.

In a small bowl, whisk together the flour, baking soda, and salt; set aside.

In a large bowl or the bowl of a stand mixer, beat the butter and sugar together until the sugar is incorporated and it's nice and fluffy. Add the eggs, one at a time, beating well after each addition. Beat in the bananas and sour cream.

In a 4-cup microwave safe bowl, warm up the nutella for about 15-45 seconds, depending on your microwave, until it's easy to stir. Stir in about 2 cups of the banana batter.

To make a more swirled cake: Alternate between adding the banana and nutella batters to the pan; gently swirl batters together by running swirling a knife through the batter after it has all been poured into the pan.

For a less swirled cake: Pour the banana batter into the pan. Pour the nutella batter on top of it.

Bake for 70-90 minutes, or until a toothpick inserted not near an edge comes out with just a few crumbs attached.

You may need to cover the top of the cake with foil to prevent it from overbrowning. If you have a 10-cup bundt pan, like me (I think), it's going to come up over the top of the pan, making for a less pretty cake that bakes slightly less evenly, but it still delicious.

Alternatively, you could use 2 loaf plans; reduce the bake time to 60-70 minutes.