Thursday, January 26, 2012

Cooking Carrot Cake Like It's The Seventies
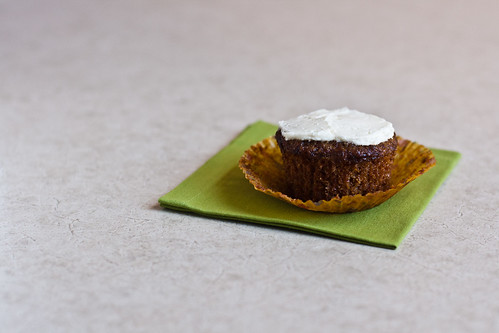
Carrot Cake Cupcake (Unwrapped)


Carrot Cake is delicious and tasty, and my thoughts on this subject clearly mean I was born in the wrong decade. Except, like fashion, food fads come around. And sure, red velvet cake may be the popular one right now, but hey, carrots are way more awesome than chocolate (okay, maybe they aren't) and you still get the cream cheese frosting!


But that's beside the point. Or maybe it is the point. I'm not quite sure. What I do know, however, is that I've made this carrot cake three times in the past month. THREE. I didn't even have the recipe with me the third time. That's how easy it is! It also means I have no idea where I originally got these proportions from, since I kind of just looked for a recipe that used the ingredients that I believed went into carrot cake, and went from there.

What prompted this carrot cake madness? Gorgeous carrots of course! Except they weren't all that pretty the third time. In case you were wondering, which you probably weren't, the carrots I used in Tehran were way more orange than the ones I picked up at a Schnuck's in St. Louis last week. But regardless of just how orange the carrots are, the cakes were tasty both places. The only time the cake, in my opinion, turned out less than stellar was when I cooked it in the form of a tube cake at my grandparent's garden house. Right before I was about to pour the batter into the pan, I thought it looked off, and realized I'd forgotten the oil. Adding oil at the last step meant overstirring the cake, bringing out the sticky property of gluten - not something you want in a tender cake. But, everybody still loved the cake, or at least they pretended to. All-in-all, I ended up giving four people the recipe for this cake while I was there. It'll be interesting to find out if any of them ever actually make it.
Carrot Cake Cupcake
Simple Carrot Cake
Note: This cake can make 2 9" cake rounds, or probably somewhere around 24 cupcakes, or a bundt cake, or a sheet cake. The cooking instructions below are for cupcakes.

2 cups all-purpose flour
2 teaspoons baking soda
2 teaspoons cinnamon
1 teaspoon ground ginger (alternately, you can use 2 teaspoons of fresh grated ginger)
1/2 teaspoon ground nutmeg
1/2 teaspoon salt
2 cups granulated sugar
4 eggs
1 cup canola oil
4 cups grated carrot (about 5-6 average-sized carrots)
1 cup raisins (or chopped, toasted walnuts), optional


Preheat the oven to 350ºF (180ºC). Line a cupcake pan with 12 liners. If you have 2 pans, line both, otherwise you'll need to bake them in two batches.

In a small bowl, whisk together the all-purpose flour, baking soda, cinnamon, ginger, nutmeg, and salt. Set aside.

In a large bowl, whisk together the sugar and eggs until pale and thick. Whisk in the canola oil.

Add the flour mixture to the wet ingredients, and with a spatula or wooden spoon, stir until just almost combined. Add the carrots and raisins or walnuts, if using and stir until all the flour is moistened.

Fill the lined muffin cups about 2/3 full of batter. Bake for 15-20 minutes, or until the tops spring back when lightly touched. Remove from oven and let cool for 5 minutes before transferring to a wire rack to cool completely.

Once cool you can top them with cream cheese frosting, if desired. See recipe below or use your favorite cream cheese frosting recipe.

Cream Cheese Frosting

8 ounces (1 package) cream cheese, softened
4 ounces (1 stick) butter, softened
1/2 teaspoon salt
1 teaspoon vanilla extract
1 cup powder sugar, or to taste

Beat together cream cheese and butter until smooth and fluffy. Beat in salt and vanilla extract. Slowly add powdered sugar and beat to incorporate.

Saturday, November 19, 2011

Taco Time!

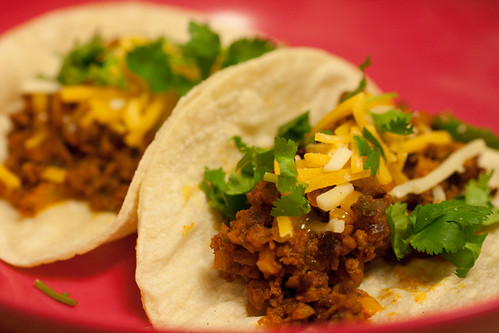
Chorizo Tacos

The problem with feeding just myself is that I frequently eat the same thing over and over and over again, with tiny variations. (The other problem is that since I share my fridge with three other people, I tend to lose my food to the depths of the fridge as one of them really likes to shop and stock up on things.) But somehow, by the time I ran out of Trader Joe's Soy Chorizo, I still wasn't sick of these. Maybe because they're super quick to make, and incredibly comforting. Maybe I have a strange idea of comfort food, but I'm okay with that. At least I've moved past my fish and chips phase of last month.

But in case you're wondering how I do it, here you go.

They key is the chorizo (onions, bell pepper, jalepeno, chorizo, extra chili powder.) Just finely chop the onions, bell pepper (I used orange), and jalepeno and saute them until soft. Add the chorizo and some extra chili powder, and heat through. Tasty and simple. Top with whatever you have on hand.

In a smaller pan, I heat up corn tortillas over medium-high heat, and then transfer them to a plate where I top them with some of the chorizo filling, and then depending on my mood, some of the following: salsa, cheese, cilantro, sour cream (I never actually choose this one), eggs.

Maybe it's not the healthiest, but it sure is tasty.

Monday, October 24, 2011

Gooey Butter Cake Cookies

Gooey Butter Cake Cookies

It's been over a month since I've last posted, and it's not for a lack of cooking. Or photographing my food. It's just that whole problem of either having a good recipe or having a good photo, but rarely both. And then being pressed for time. Or writing half a post and never posting it because by the time I finish it, I've forgotten what I did if it's something I came up with, or if it's something I adapted, I can't find the original recipe and/or forgot my modifications.

But I'm not posting now to tell you all the things I haven't done, but to tell you what I have done. To remind myself of what I've done, I made an album on flickr of food I've made at school. Sure, it dates back to stuff from freshman year, but now it's organized! So if you see anything there that looks tasty and lacks a link back to this blog, then pester me and I can try to figure it out and post about it! Most of them say coming soon, but that might be a lie. I may never blog them because I'm forgetful (and, in the case of this cake, I found it underwhelming.)

And then, when I'm not cooking or baking (which definitely doesn't happen enough) I'm either in class, watching The OC with my roommate, studying, writing papers, or doing stuff for My Car And My Guitar or something. I'm not going to provide you with some exhaustive list you don't want, because that's just less time I can spend talking about these cookies. Which are an abomination by the way.
Gooey Butter Cake Cookies


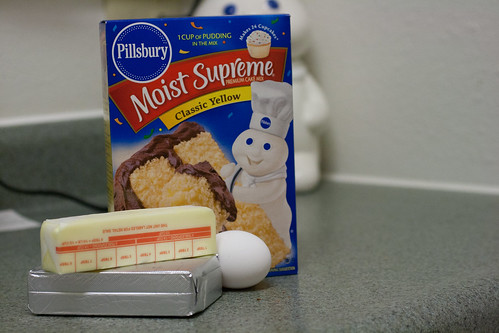
Yeah. See those ingredients? I seriously can't believe I made them. Not only that I made them, but that I've made them four times. Or maybe it's five. They're easy, affordable, and comforting. A twist on that St. Louis classic, Gooey Butter Cake, in cookie form! And they're not too expensive or anything, especially when cake mix is on sale and you can get it for $1 or less, and then the 75 cent stick of butter, the 20 cent egg, and the $2 cream cheese. I keep forgetting about powdered sugar, but it's like 45 cents of that probable. Five bucks and an hour of my time (including clean up) isn't too bad for around 3-4 dozen cookies!

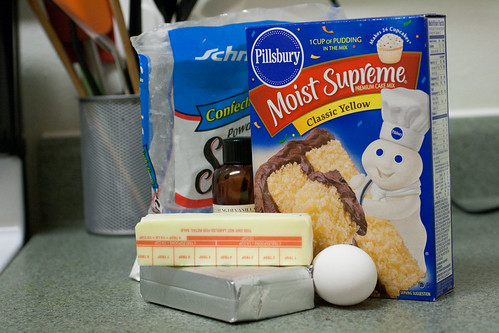
And okay, I forgot some ingredients in the picture above. So here's the correction:
Gooey Butter Cake Cookies

But I never use the vanilla anyway.

But, like I said: Easy. Simple. Quick. Crowd-pleasing. So what are you waiting for?

Gooey Butter Cake Cookies
Makes 3-4 dozen cookies

1 box yellow cake mix
1 package (8 oz) cream cheese
1 stick (4 oz) butter, at room temperature
1 large egg
1/3 cup powdered sugar

Preheat oven to 350ºF and line 2-3 cookie sheets (or just bake in batches!) In a large bowl, beat together cream cheese and butter until smooth. Beat in egg. With a spatula or wooden spoon, stir in the cake mix. It will be very thick, and may take a while.

Gooey Butter Cake CookiesGooey Butter Cake Cookies

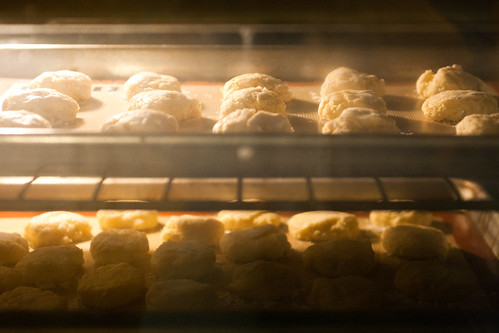
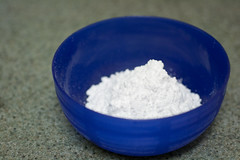
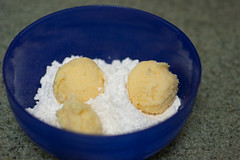
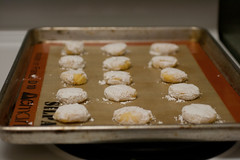
Pour powdered sugar into a small bowl. Roll heaping teaspoons of dough into balls and coat one side with powdered sugar. Place on baking sheet face up. Flatten slightly.
Gooey Butter Cake Cookies

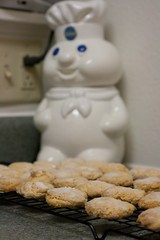
Bake cookies for 7-10 minutes, or until bottoms are browned and tops are crackly and dry. Enjoy!

Monday, October 17, 2011

Omelet for One

Sunday Morning Breakfast


If there's one thing I love about having a kitchen, it's being able to eat breakfast on my own schedule on the weekends. I don't have to worry about carrying pans and food to a dorm kitchen to cook, eat in a too large room by myself, and then immediately clean up. There's nothing relaxing about that, and that's something breakfast should be on a weekend morning.

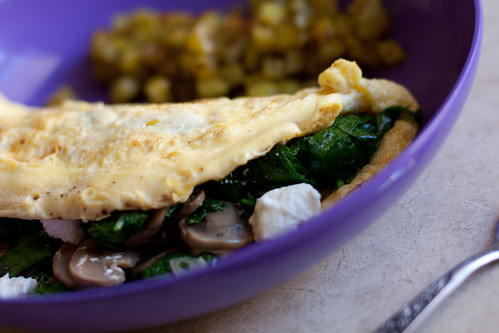
With two of my roommates out of town, and another not allowed to eat until after her blood work, I took my time and made myself a nice breakfast. While making my dinner the night before, I'd cubed some potatoes and sauteed some half-frozen mushrooms that had stuck to the side of our fridge with garlic. I chopped up some onions, threw them in a pan, and cooked them up with potatoes. Having recently learned how to cook potatoes, I'm still really excited by this. Unfortunately, I'm not sure what I do. I think I just poke them until I think they're done. Meanwhile, I reheated the mushrooms, adding in some spinach with them.

In a small bowl I beat together my eggs with some milk, and poured it into a nice small pan, lifting the egg up as it cooked to let the runny egg flow underneath. Once it seemed almost cooked, I added the mushrooms, spinach, and some cheese, put a lid over the pan for about 30 seconds to let it finish cooking. I removed the lid, folded over the omelet, and slid it onto my plate along with some potatoes. Then it was time for Sunday Morning. Bon Appetit!

Sunday, September 11, 2011

Eggplant Day

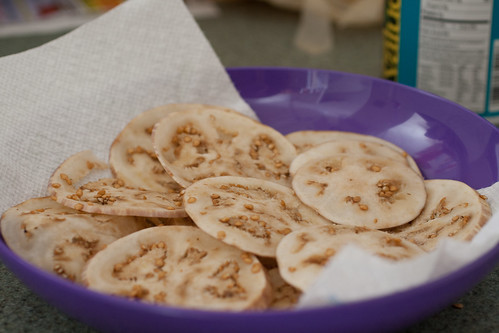
Eggplant

Do you have those foods that at one point you absolutely detested and would avoid any dish at the mention of their name? Yeah, me too. But the number's gone down drastically in the past ten years. But there was a point in my life when, unless I didn't know it had eggplant in it, or it was nice and creamy like kashk-e bademjan, I wouldn't touch it. Just the thought of it grossed me out. It was gross and bitter with a weird texture.

Clearly, my opinion on eggplant has changed. I get super excited whenever my dad roasts eggplant on the grill knowing it means some sort of delicious garlicky eggplant dip is in my future. My mouth waters at the mention of fresh eggplants from my aunt's garden. And at the sight of gorgeous graffiti eggplant from a nearby farm at the grocery store for 99 cents a pound, I can't help but grab a gorgeous globe, just thinking of what I can do with it.

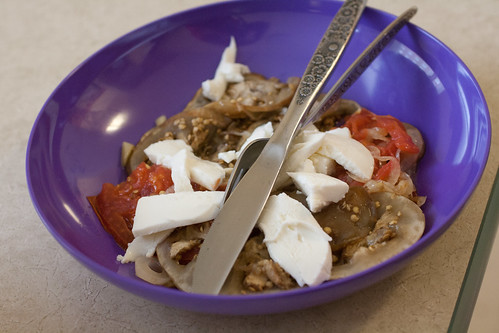
And then, I find out, that like me of the past, my roommates all detest eggplant. One will only touch it if it's deliciously fragrant and disguised, which isn't something I've mastered, and another is allergic, which is an acceptable excuse. Leaving me to come up with something easy and simple for one. And with my failure of planning while at the grocery store, I didn't have much to work with. I thought about making a pan-fried eggplant sandwich with carmelized onions, and somehow that turned into a really ugly, but tasty, dish. Layers of thinly sliced eggplant and tomatoes topped with garlicky sauteed onions and fresh mozzarella. Yum!

Dinner

Monday, August 29, 2011

New School Year, New Post

Spicy Double-Chocolate Mango Cookies

It seems that somehow this gets more neglected over the summer. Summer, when in theory I have abundant free time, easy access to groceries and a kitchen, and willing test subjects in the form of my family. Unfortunately, those three things don't quite add up, and it's difficult to cook and take pictures whilst spending 28 hours a week commuting (and out of that, about 100 minutes a day actually on various trains and buses, the rest of the time was spent standing still at stops or walking. I now have a love/hate relationship with the CTA.) And in addition to that, I'm also one-half of My Car And My Guitar, a music news/reviews site.


But now that I'm back at school, it seems for the first time since the week I left I have something to post, following in what seems to now be a tradition (the mini gluten-free cupcakes from last year, and the Peanut Butter Chocolate Chip Cookies from the first Friday of my freshman year). And these aren't even the first thing I've made since I've been back. My first morning here, I borrowed my roommate's skillet and made a nice big (and bland) spinach omelet for three, and later that evening whipped up a batch of chocolate crinkles, with delicious smells wafting through our spacious apartment.

But last night, after being sadly (and predictably) disappointed by the VMAs (and the PDA in the living room), I opted to bake something interesting and bloggable. And with that, I present to you Spicy Double-Chocolate Mango Cookies (if you can come up with a better name, please, let me know.)

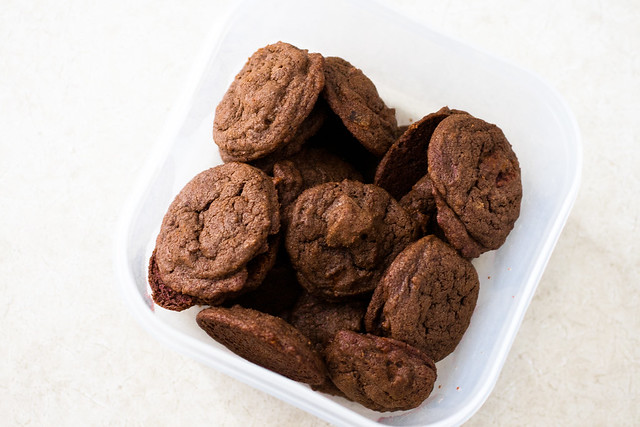
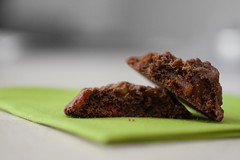
These tasty cookies pretty much require a glass of milk or your preferred equivalent. Rich and chewy, strong and spicy, they pretty much come on as a full-force attack. And didn't lead anyone to question my sanity before biting in as with those corn brownies I made freshman year.

So if you find yourself with a tiny bit of time on your hand, a Trader Joe's nearby (or time to put sugar, cayenne, and paprika on your mangoes), a warm oven, and a craving for something a little spicy, give these cookies a try.


Spicy Double-Chocolate Mango Cookies

Spicy Double-Chocolate Mango Cookies
Makes about 3 dozen cookies

1/2 cup butter, softened
1/4 cup + 2 Tablespoons granulated sugar
1/4 cup + 2 Tablespoons packed brown sugar
1/2 teaspoon baking soda
1/4 teaspoon cinnamon
1 egg
1 1/2 ounces unsweetened chocolate, melted and cooled
1 cup all-purpose flour
4 ounces chili-spiced dried mango, chopped
3 ounces milk chocolate, chopped or 1/2 cup milk chocolate chips


Preheat he oven to 350ºF. Line 2-3 baking sheets with silicone baking mats or parchment paper.

In a large mixing bowl beat butter, granulated sugar, brown sugar, baking soda, and cinnamon until well combined, scraping sides of bowl occasionally. Beat in eggs until combined. Beat in melted unsweetened chocolate.

With a spatula or wooden spoon, stir in flour, followed by chopped dried mango and milk chocolate.

Place spoonfuls (I use a 2tsp. scoop) of dough 2 inches apart on prepared pans. Bake in oven for about 10 minutes. Let cool slightly and serve, or transfer to wire cooling rack and let cool completely before storing.


Tuesday, May 17, 2011

Modified Tuna Boats Not The Best Idea


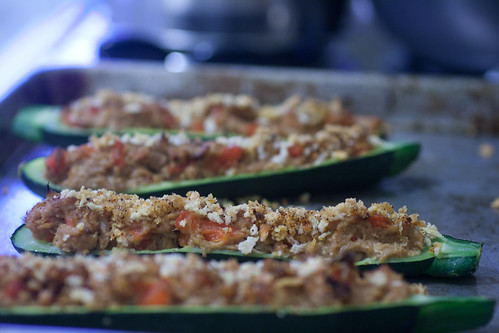
Zucchini Boats with Tuna

Coming home, I learned something new about my father. He doesn't really like tuna. After spending the unusually steamy May day job hunting, steaming hot food was the last thing I wanted to eat. So I set my eyes on making a macaroni salad, something I eat far too much of when I'm at school. The one I eat at school is elbow macaroni, roasted red peppers, parsley, and chunks of creamy smoked gouda and salami in a balsamic dressing. But I wanted to do something different, and after a failed brainstorming session with myself and some browsing, I came across something delicious looking on Simply Recipes A tuna macaroni salad that looked tasty and for which I had half the ingredients. I quickly texted my parents to make sure they were okay with the idea, and I got a quick, and brief, response from my dad: "No."

Since I like to make people happy, the macaroni salad was out of the question. And with that, my mind switched from being set on eating macaroni salad to having canned tuna for dinner. And my favorite recipe using a can (or two) of tuna would have to be these simple zucchini boats I've made quite a few times over the past four years. But this time, I decided to mix it up. Instead of basic and oven-roasted tomatoes, I decided to go with roasted red pepper and a jalapeno mayonnaise. Gorgeous tiny zucchini was just 69 cents a pound at the store, and I probably did not take advantage of that as I should have. With all my ingredients in my basket, I headed home and started prep on dinner.

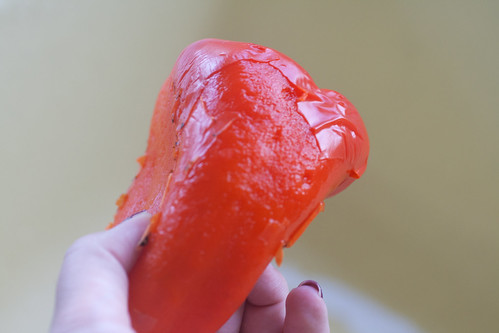
Roasted Red Pepper
After a failed attempt at roasting a red pepper (it kind of worked, my hand cramped up from holding the tongs before it had cooked long enough) and discovering that our mayonnaise had expired a few months ago after pureeing the jalapeno pepper in it, I made some quick swaps (some questionable greek yogurt and a generous dose of ancho chili powder and a dash of cayenne) that probably decreased the tastiness and increased the safety. But it worked, it was just... different. And not as good as usual, which is quite tasty.

So I'm not adding this variation to my list of things I've succesfully made. However, when Dad isn't around, I'll still make these zucchini boats.

Sunday, April 03, 2011

There's a pie in my cupcake!

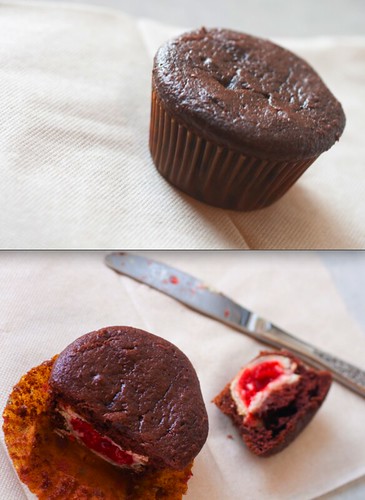
Surprise Cupcakes

Happy April! I'm a little belated with posting this, given that it's no longer April 1st, but they're fun for a party, and if decorated, I'm sure they'd actually be pretty. My butter just wasn't being nice, and neither was the microwave, so I opted out of frosting these cupcakes.

Over the summer, my friend texted me a picture of a chocolate cupcake with white frosting on top and a mini cherry pie in the middle that he saw online. I was intrigued, and told him I was tempted to try to make them. His birthday was a couple of weeks ago, and since it was midterms week, I decided to try to cut down on the weight of my groceries and the amount of time I'd spend on it, even if that meant sacrificing quality, so he could have a cupcake with a tiny pie in the center.

They're pretty simple to make, though because of the two steps, a bit more time consuming that just making plain chocolate cupcakes from a box, but only by about 20 minutes or so.

Surprise Cupcakes
Surprise Cupcakes
makes 12 surprise cupcakes, but can easily be stretched to make more

1 box chocolate cake mix (and the oil, eggs, and water the recipe calls for)
1 package refrigerated pie dough for a double crust pie
a can of cherry pie filling (you'll need about 2/3 cup or so of filling, maybe less)
frosting of choice, optional

Preheat oven to 450ºF. Cut pie dough into 12 2" circles, and press into a mini muffin pan. Fill each with a spoonful of cherry pie dough. Cut out 12 1" circles from remaining pie dough, and top each pie with the dough, pressing edges together. Bake for about 8-10 minutes, or until edges are golden. Remove from oven and let cool until you can remove them from the pan, about 5 minutes. Decrease oven temperature to 350F.

Meanwhile, prepare chocolate cake mix as directed.* Line a muffin pan with 12 liners, and scoop a heaping tablespoon of batter into each one. Place a mini pie in each muffin cop, and top with another heaping tablespoon of batter so that they are completely covered. Bake in 350ºF oven for about 15-20 minutes, or until tops are dry and spring back when pressed lightly. Remove from oven. Cool slightly in pan, and then transfer to a wire rack to cool completely. Ice or enjoy as is!

• Since it should make enough for 24 cupcakes, you'll have extra batter. Alternately, you can buy/make more pie dough, or make more mini pies, and make that number of the cupcakes as described enough (my guess is around 30 total) or just make extra plain cupcakes with the remaining batter. A package of pie dough should have enough crust for about 14-16 mini pies. My guess is that a small can of cherry pie filling will probably make about 20 or so pies.

Friday, March 18, 2011

Another Cake With Alcohol

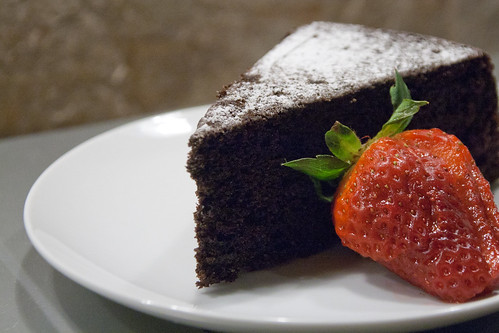
Guinness Cake

I'm not an alcoholic, I promise. I don't even drink the stuff, and not just because I'm underage. I like water. And tea. And that's about it. But when I saw this recipe in the very first issue of Vegetarian Times that I ever bought, back in March of 2006, I decided I wanted to try it. I searched through the house, and couldn't find any Guinness, and there was no way I could make a "Guinness Cake" with the random bottles of beer I found in the fridge. So I put it in the back of my mind to try sometime, at a later date. And now, almost exactly five years later, I pulled out the magazine and gave the Guinness Cake a try. And I have a pretty good reason.

When I'm at home, I have dinner with my great-aunt and uncle on Friday nights. My great-aunt is Irish. She likes beer (thought not Guinness). And yesterday was her birthday. The first detail was irrelevant, but the last two reminded me of this cake, and provided me with the excuse I've needed to try it out. I sent a frazzled mother to the grocery store before breakfast (which, here, starts selling alcohol at 8 AM, meaning she had to wait a while) for beer, gathered up the rest of the ingredients, and whipped up this fairly simple cake. I couldn't get my cocoa/beer/butter mixture to be nicely mixed and smooth, but that didn't seem to ruin the final product. Not even my aunt's dislike of Guinness kept her from liking it, because the cake does not taste like Guinness. The beer instead seems to add some moisture and depth to the flavor of this nice and simple chocolate cake.

Guinness Cake


Also, like usual, I didn't follow the recipe exactly. We usually have yogurt in the house, so it didn't make sense to go out and buy sour cream unnecessarily. The recipe below reflects the changes. And, for some reason, the recipe on the VT site has a different name than the printed one, and mentions Guinness nowhere. Instead it suggests Darcy's Dublin Stout or Samuel Smith Imperial Stout as examples of black stouts to bake the cake with.

Guinness Cake
Guinness Cake
adapted from Vegetarian Times, March 2006
makes a 9" round cake, serves 8 or so

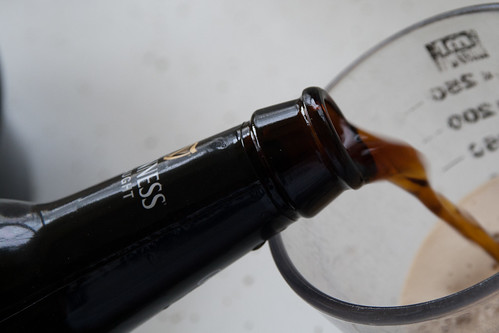
2/3 cup stout, room temperature (I don't know how to measure beer. It was too frothy at the top, so I ended up using 2/3 cup+ with the froth since I did a bad job pouring)
10 Tablespoons butter
1/2 cup cocoa powder
1 1/3 cups granulated sugar
1 1/3 cups all-purpose flour
1 teaspoon baking soda
1/2 teaspoon salt
1 large egg
1 large egg yolk
2/3 cup strained yogurt or sour cream
powdered sugar, for dusting

Preheat oven to 350ºF. Butter a 9" round pan and line with buttered parchment or dusk with cocoa powder.

In a heavy saucepan over medium heat, bring stout and butter to a simmer. Whisk in cocoa until smooth. Cool slightly.

In a medium bowl, whisk together flour, sugar, baking soda, and salt.

Beat egg, egg yolk, and yogurt with an electric mixer in a large bowl until smooth and blended. Add beer-chocolate mixture and beat to combine.

Beat in flour mixture for 15-30 seconds on lowest speed. Fold batter using rubber spatula until completely combined. Don't fold too much. Pour into prepared pan.

Bake about 45-50 minutes, or until tester inserted into center of cake comes out clean. Cool about 10 minutes on rack. If cake needs loosening from sides of pan, run a small knife around edges. Turn out cake onto rack (if using parchment, peel off) and let cool completely. Sift powdered sugar over top of cake just before serving.

Friday, February 18, 2011

The Gluten-Free Layer Cake

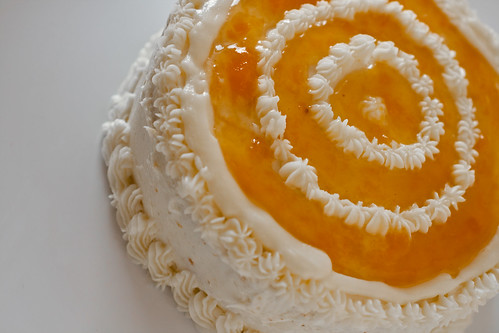
Peach Schnapps Layer Cake

Last semester while talking to one of my roommates, it was discovered that she likes peach schnapps. She really likes peach schnapps, and, it's not something that makes her sick. Well, in moderation. I'm sure if she got a little too excited and drank a bit too much, she wouldn't feel so great. But since schnapps happen to be gluten free, she can imbibe in the candy-sweet alcohol as long as nobody's carding her.

It's not a secret that I don't shy away from baking, cooking, or lowering freezing points with alcohol, so it shouldn't come as a surprise that I decided to challenge myself to make a gluten-free cake incorporating the sickeningly sweet smelling schnapps.

Unfortunately, she never did get to try the cake that was originally imagined for her birthday, but all the gluten-tolerant tasters thought it was quite tasty. One even remarked, "Is this really gluten-free? It's really good." And, unless my checking all the labels failed me, it really is!

Making this cake was not without some slight hitches, mostly because of my lack of sleep and attention. I took all the ingredients out to bake the cake layers at 7pm last Friday night, after sleeping a mere 2 and a half hours in the previous 36. I failed to notice that I was looking at a recipe that made 80 mini cupcakes. A 6" cake does not require 4 pounds of batter, which I think is what I ended up with. I started divying up the batter by weight, hoping to make equal layers, and when the first one came out of the oven, I realized if I used more than just that for the cake, I'd end up with a leaning tower. I baked off a dozen cupcakes and a slightly smaller cake layer that I ended up omitting from the cake, deciding to go with a slightly shorter cake (If you follow the recipe below, yours may end up a bit taller than pictures from this recipe, but no worries! There's just enough frosting to take care of that!) Plus, it never hurts to have an extra 12 ounces of cake lying around. With the addition of some whipped cream and frozen fruit, it can be turned into a tasty (but extremely unphotogenic) mango trifle later in the week!

Peach Schnapps Layer Cake
Peach Schnapps Layer Cake That Just So Happens To Be Gluten-Free
makes 1 6" 3 layer cake

For cake layers:
1 cups (200 g) granulated sugar
2 large eggs
1 1/4 cups gluten-free rice flour all-purpose mix (I used 200 grams of Gluten Free Pantry All Purpose Flour)
1/4 teaspoon salt
1 1/2 teaspoons baking powder
1/2 teaspoon xanthan gum
1/2 cup canola oil
1/2 cup milk
*add a teaspoon of vanilla extract, especially if you want to skip out on the schnapps

2/3 cup peach preserves

For peach schnapps syrup:
1/4 cup (50 g) sugar
1/2 cup water
2 Tablespoons peach schnapps

For peachy buttercream:
1 cup/2 sticks unsalted butter, softened
2 1/2 cups powdered sugar
pinch salt
1/4 cup peach preserves


To prepare cake layers:
Preheat oven to 350ºF. Grease a 6" round cake pan (mine's 3" deep).

Beat sugar and eggs in large bowl of electric mixer at medium speed for one minute. Add flour, salt, baking powder, xanthan gum, oil, milk, and vanilla and beat at medium speed for about a minute, or until batter is smooth.

Scoop batter in prepared cake pan. Place pan in center of oven and bake for about 45 minutes or until top springs back when lightly touched or a toothpick in the center comes out with only a crumb or two. Remove from oven and cool on a wire rack for a few minutes, remove from pan and cool completely.

To prepare sugar syrup:
Heat water and sugar in a small saucepan, stirring, until sugar is completely dissolved. Remove from heat and let cool. Stir in schnapps.

To prepare frosting:
Place butter in a medium bowl and beat until fluffy. Add powdered sugar and salt and beat until smooth. Beat in peach jam. (If planning on piping frosting, you may want to set aside some frosting before adding jam to prevent getting clumps stuck in your bag.)


To assemble cake:
Level the top of the cake. Slice cake into three layers. Place the base of the cake on a cake plate or large plate, sliced side up. Brush with syrup. Spread 1/3 cup peach preserves over cake layer, and top with another layer of cake. Brush with syrup and spread remaining 1/3 cup preach preserves over the layer. Top with the remaining layer of cake and brush entire cake with remaining syrup.

Scoop about 1 cup of frosting on the top of the cake and spread over the top and sides of cake, adding more frosting as necessary. Smooth sides and top, and, if desired, pipe designs with remaining buttercream.

Store in refrigerator for up to 2 or 3 days. Take out about 20 minutes before eating or it'll be too cold and not taste as awesome.