Sunday, August 12, 2007

They're More Mellow in Yellow

IMG_5854_3
Yesterday I was thrilled to find yellow tomatoes at the market. I don't mean heirloom tomatoes, but just your "ordinary" every day tomato in yellow, whatever that "ordinary" tomato may be. I'm not exactly a tomato aficionado. In fact, this may come as a surprise considering how often I eat them, but I am not much a tomato person. I've been slowly growing to like them, but sometimes it still depends on the day and the tomato. I'm not sure if these tomatoes were flavorless, or just milder, but I liked them. They were bright yellow and juicy, but not too juicy, which was just what I was looking for to make tomato stacks.

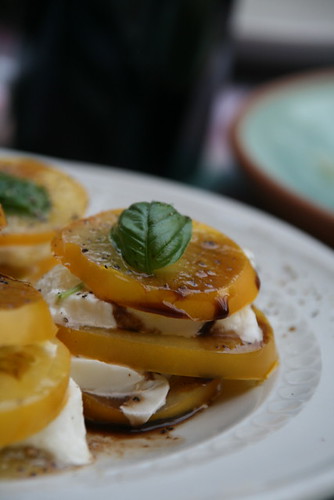
There's nothing original about them, they're just a more portioned way to make a caprese salad, I suppose. But it is simple and just so pretty! They aren't exactly spectacular, more of a refreshing taste, but I've been wanting to make some anyways.

Stacked Caprese
makes 4 5-tiered stacks (quite small, so serves one or two as a salad, or 4 as a light first-course)

2 medium tomatoes, such as roma
1 ball of ovoline fresh mozzarella, about two to three ounces
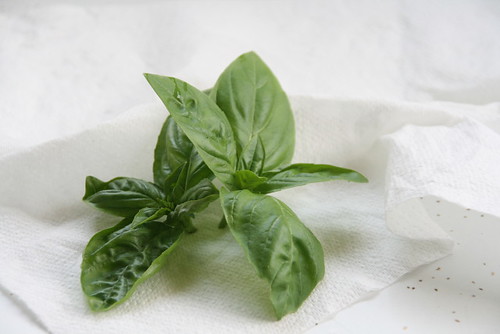
12 basil leaves
salt
pepper
balsamic vinegar

Slice of top of tomatoes and slice rest of each tomato into 6 slices. Sprinkle with salt and pepper to taste.
Slice fresh mozzarella into 8 slices.
Staring with a slice of tomato, top with a slice of cheese and a basil leaf, another slice of tomato, another slice of cheese, another slice of tomato, and top with a basil leaf. Make 3 more with remaining ingredients.
Drizzle with balsamic vinegar and serve.

Tuesday, July 24, 2007

The Summer's Version of Eggplant Parmesan


On Saturday my Dad went to the farmer's market. I've been going alone since I can't put up with my grandfather's remarks of "everything is so expensive" and my Dad's skepticism about the food. But that was earlier, when the season hadn't yet yielded its bounty of juicy peaches, delicate squash, and oblong cucumbers. Now they've arrived.

I, however, was at a different market with different things, filled with fresh Ontario produce (such as tiny yellow-green sugar plums that my mouth couldn't help but pucker at the sight of) that I couldn't have. (My cousin did buy me the plums, even though I half-heartedly argued against it. I at least enjoyed two before the customs officers took them away. I knew they would, but my cousin wouldn't keep them.)


By the time I returned home with lavash and sangak, as well as some kashk and reshteh (I was in Tehranto, after all), Dad already had the freezer filled with roasted eggplant (perfect for a last-minute dinner of Mirza Ghasemi or dad's irresistible eggplant dip for a party), and the fridge with a handful of roasted beets. (Note to self: use the beets!)

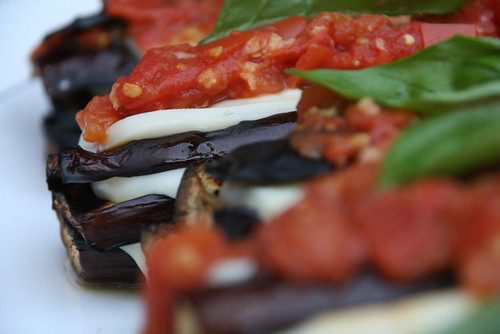
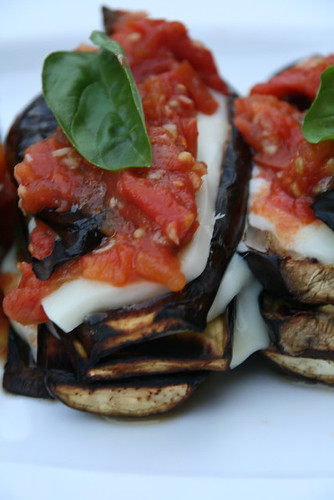
I was also excited to see eggplants in the crisper drawer of the fridge. I'd been wanting to get some eggplant to try out a grilled version of eggplant parmegiana. I'd seen it in Gourmet and thought that it looked fun. I just didn't feel like getting out the magazine and following a recipe, which is out of character. Instead I headed to the store, bought about a pound of mozzarella, a couple tomatoes, and I was set.
Though the whole not-following a recipe does have its weak points. I checked to make sure we had Parmesan, and then completely forgot to use it. I think the flavor may have been better with it and a bit less mozzarella, which is what I will try next time.


Grilled Eggplant Parmesan
inspired by the recipe in Gourmet, June 2007
Serves 4

4 medium eggplant
3/4 lb mozzarella cheese, sliced into the 16 slices
4 medium tomatoes
5 cloves garlic, minced
1/2 teaspoon crushed red pepper flakes
20 medium-large basil leaves, plus a few more torn
salt
oil, for brushing

Prepare grill.

Dice tomatoes. In a small saucepan over medium-high heat, combine tomatoes, garlic, red pepper, and a few torn basil leaves. Bring to a boil, stirring occasionally. Reduce heat and cover, stirring occasionally, about ten minutes.

Meanwhile, slice each eggplant lengthwise into five slices. Brush both sides with oil and sprinkle with salt. Grill eggplant over medium-heat, flipping once, for about 15 minutes or until tender and cooked through. Try to keep track of which eggplant slices belonged to which eggplant.

To assemble, starting with one side of the eggplant. Top with a slice of cheese, basil leave, and small spoonful of sauce. Add next layer of eggplant and repeat, ending with top of eggplant. Top with a spoonful of sauce and a basil leaf. Repeat with remaining three eggplants.

Thursday, July 19, 2007

Ricotta Juice and Ravioli


My dad's friend brings us fresh homemade (by a small Italian store) ricotta every couple of weeks. One week, he brought the ricotta with extra "ricotta juice" and made a soup out of it with some ditalini and the reserved pasta water.


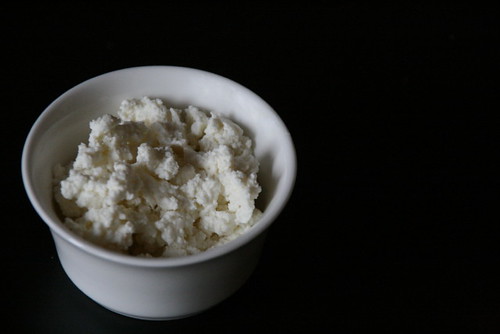
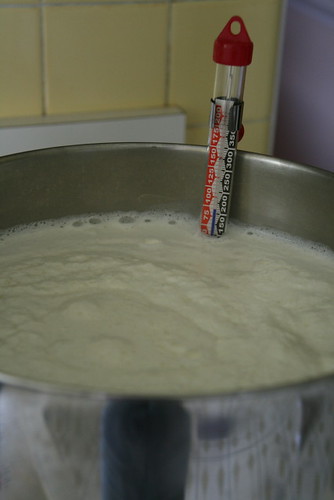
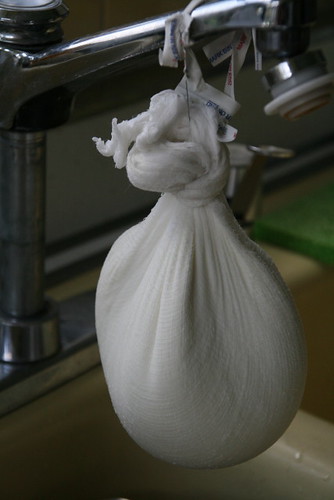
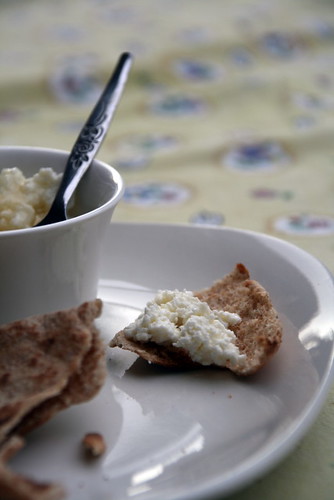
Over the weekend, I decided to try making homemade ricotta. It wasn't difficult at all, nor extremely time consuming (about an hour or so, but you could be multitasking as long as you remain close by). It wasn't cheaper though, nor better, than the ricotta that we get every once in a while. Maybe the only difference was the use of hormone-free milk (but I couldn't get a large enough hormone-free buttermilk, so I suppose that defeated that goal.)


My favorite thing to do with ricotta is to mix in some honey and eat it for breakfast, but since I made around 3 cups or so of ricotta, I needed another way to use it before it went bad. I saved the whey from when I made it, or as Franco likes to call it, the "ricotta juice", and considered making the ricotta soup. But then I came up with an idea that could actually serve as dinner.

I knew I wanted a pasta dish of some sort, and I wanted it to incorporate the ricotta, and possibly the whey, but I wasn't sure exactly what. I considered making pasta and tossing it with some ricotta, basil, and zucchini (I bought squash at the farmer's market over the weekend); making a fresh tasting lasagna with ricotta and pesto, or ravioli. The ravioli appealed the most to me. I've never made ravioli, but was feeling like some after finding an old issue of Food & Wine that had pasta sheets with crab between them and called it ravioli. For some reason, after seeing it, I wanted ravioli.
But I didn't want something thick and doughy. I wanted the light summer flavors to stand out, so that meant that I was not going to be able to make the dough. A rolling pin would not stand up to the job of making the pasta thin enough. Remembering Deb's post on pierogi, I decided on wonton wrappers and set out to make my ravioli. (Well, I did go to the store with my awesome new grocery basket to buy some milk and whole-wheat penne as a back-up, but that isn't really relevant.)

I also now realized that by changing the presentation of this dish, it is incredibly simple to make. Maybe I will submit some recipes to Bon Appetit (once I have the required number), because this is simple, and tasty, enough to make again.


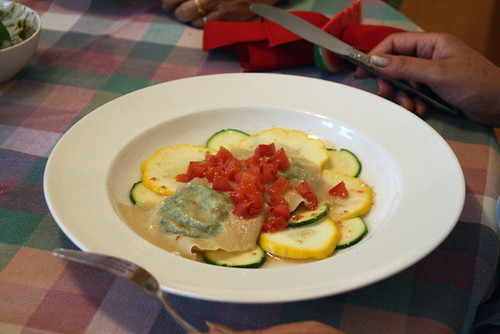
Ravioli in Ricotta Juice
serves 5 (as a light meal, or more realistically, 2-4)
10 Basil Ravioli (recipe below)
3 cups whey or vegetable broth
2 medium tomatoes
3 medium summer squash (such as pattypan, yellow squash, zucchini, etc.)

In a large saucepan, heat whey or broth over medium heat. Dice tomatoes and add to the pot. Either thinly slice or dice squash, depending on if you want to add them to the whey or leave them raw. (I like raw squash, but some people don't. Mom would have preferred me cooking them.)

In a bowl, portion raw zucchini (unless cooking) and ravioli. Divide whey/broth among bowls and serve.


Basil Ravioli

makes 10-12 ravioli
1 cup basil leaves
1 cup (6 ounces) ricotta cheese, divided
3 garlic cloves
1/4 teaspoon salt*
20-24 wonton wrappers

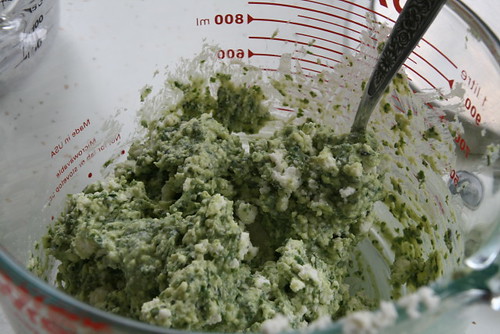
In a food processor, combine basil, 1/2 cup ricotta, garlic, and salt. Process until smooth. Remove blade or transfer mixture to a bowl. Add remaining ricotta cheese and gently mix in with a fork.

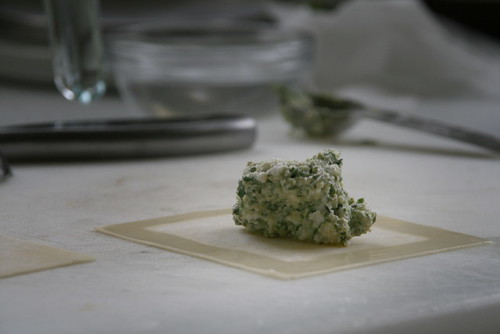
In a small bowl, pour some water to use to wet fingers. Lay out a wonton wrapper, and wet along the edges with a finger. Put a tablespoon of the cheese mixture in the center. Wet the edges of a second wrapper and place on top. Squeeze out air and with damp fingers seal the edges together tightly.
Repeat with remaining mixture and wrappers.

Bring a large pot of salted water to a boil. Add ravioli in a single layer so they don't stick to each other and cook about 3 minutes, or until wrappers are cooked and soft.

*My ricotta didn't have any salt in it, and the filling didn't seem to need anymore salt than that, so salting to taste would probably be a good idea, and tasting it because how salty the cheese is would also impact that.

Thursday, July 12, 2007

Ew, anchovies!


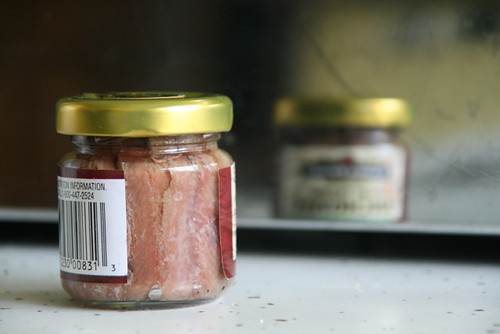
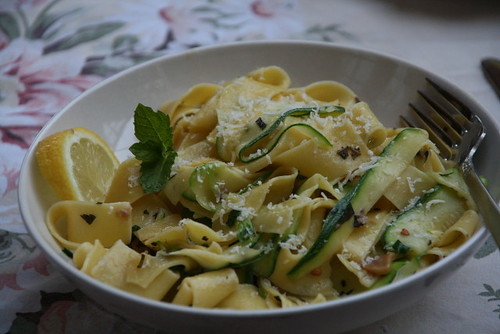
I think I may agree with that sentiment. I figured, I'll give you a try. Hello little anchovies in the see through glass jar. You don't look too bad. Boy was I wrong. As soon as I twisted off the cap I started wishing we hadn't used the end of the jar of capers Saturday morning and I'd have some salty element to replace the anchovies. I'm not sure if capers would have done the trick, but they sure do smell a lot better.


I suppose not that many people actually like anchovies, but I'm not sure if I've ever had anchovies that weren't disguised or hidden (such as in Caesar dressing) so the word anchovies did not scare me away from trying out the recipe. Which, other than the whole nasty smell while making it and only using half as many anchovies as called for because I couldn't bring myself to open the other jar, was followed closely.


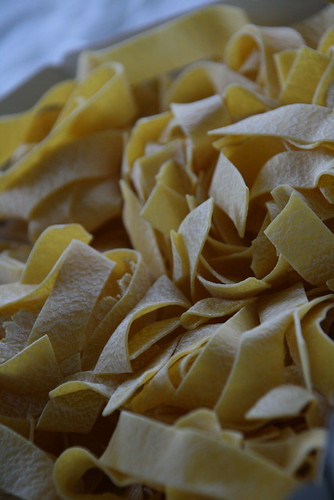
The most surprising (in a good way) part of the meal though was what happened to be the most expensive: the pasta. But I cooked it just right (I actually managed al dente for once!) and it helped to make the meal. Bionaturae was the only pappardelle pasta I found (and I did go to two grocery stores), and all it was was semolina and eggs. I was almost tempted to try to make pasta, given the simplicity of the dish, but figured without anything to flatten it for me, I might make something gross and full of elasticity.


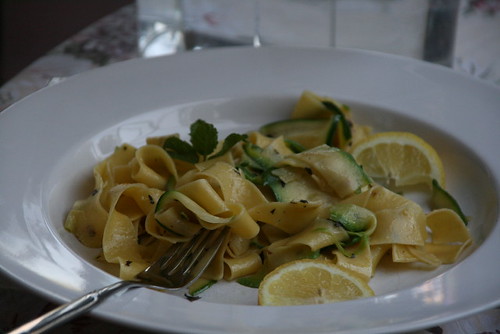
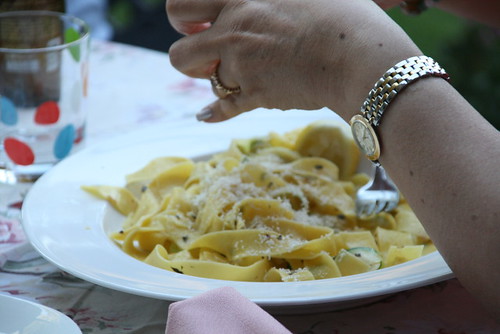
But I digress. This simple dish is perfect for a summer night when you want something warm and light tasting. Following it with raspberry sorbet, well, that can only make it better.


Pappardelle with Zucchini, Mint, and Anchovies

adapted from a recipe by Melissa Clark in Fast, a special Food & Wine

2 ounces anchovies, drained and minced
1/4 cup finely chopped mint
2 tablespoons snipped chives or tareh
1/4 cup + 2 Tablespoons extra-virgin olive oil
4 large garlic cloves, thinly sliced
1/4 teaspoon crushed red pepper
2 lbs medium zucchini, thinly sliced lengthwise*
coarse salt
2 (8.8 ounce) packages dried pappardelle
Freshly grated parmesan cheese and lemon wedges for serving

Bring a large pot of salted water to a boil.

In a large bowl mix together the anchovies, mint, chives, and 2 Tablespoons of the oil.
In a large skillet heat the remaining 1/4 cup of oil over medium-high heat. Add the garlic crushed red pepper and cook over moderate heat until the garlic is lightly browned, about 3 minutes. Add the zucchini, season with salt, and cook over moderately-high heat, tossing occasionally until tender, but crisp, about 3 to 5 minutes.
Meanwhile, add the pappardelle to the boiling water and cook until al dente. Drain the pasta in a colander, reserving 1/2 cup of the cooking water. Return the pasta to the pot and stir in the zucchini and reserved cooking water. Stir together gently over moderate heat.
Transfer the pasta to the large bowl with the anchovy mixture, and toss until the pasta is coated. Serve with parmesan and lemon wedges.

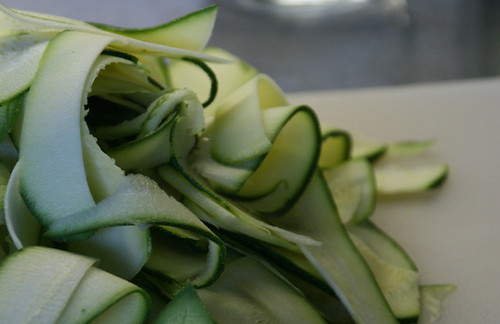
*I have trouble thinly slicing things, so I attempted to use a mandoline. I'm not so great with mandolines either, so I cut my right thumb (I cut the left thumb last week with a serrated knife) and decided to just use a vegetable peeler to get strips of zucchini. The only problem with that method is that you end up with a chunk of zucchini. If anyone knows an effective way to thinly slice zucchini lengthwise, please do tell!

Wednesday, July 11, 2007

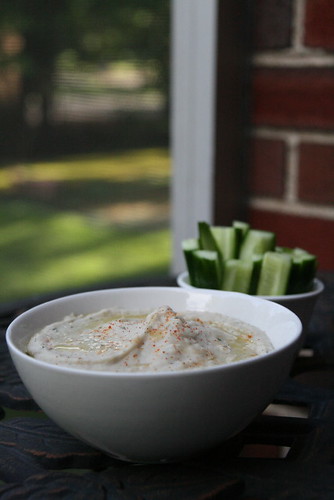
Herbalicious Creamy Bean Dip


I wanted to make some sort of a dip, and with fresh herbs in the garden going unused, why not an herbed white bean dip? I stopped at the store on my way back from showing Ame around near our house, and picked up a can of cannellini beans.
I can't take all the credit though for coming up with the idea. I had been paging through Fast, which came in the mail last month for having entered the F&W Kid Cook contest (the winners are in the August issue, and the 6-year-old with his beet risotto!), and saw a white bean dip with herbs and took a cue from it.


Herbed Garlicky White Bean Dip
makes about 1 cup

2 Tablespoons extra-virgin olive oil, plus more to drizzle on top
3-4 cloves garlic, peeled
2 teaspoons rosemary leaves pulled off stem (about 2 small sprigs)
1 1/2 tablespoons thyme (pulled off stems, about 5 small sprigs)
1 (15-oz) can of cannellini beans
salt
cayenne pepper, to taste

Heat 2 Tablespoons olive oil in a medium skillet over medium-high heat. Add garlic, rosemary, and thyme and cook until garlic is browned and fragrant, about 2 to 3 minutes. Add beans and toss to coat. Let cool a few minutes and transfer to a food processor; add salt and a pinch of cayenne. Process to a puree and transfer to a bowl. Drizzle olive oil on top. Serve with bread, chips, or vegetables.

Tuesday, July 10, 2007

Dessert...Insired by a salad


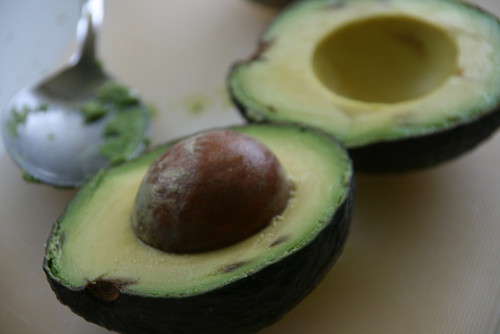
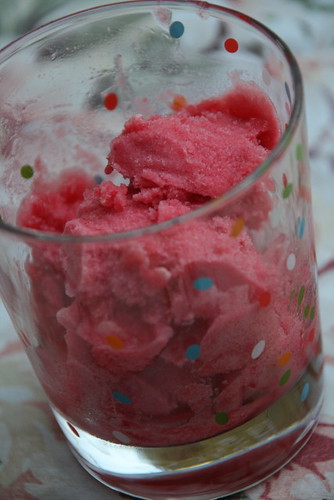
The current issue of Eating Well has raspberries on the cover, so it isn't surprising that there is an article on raspberries with recipes for them. I remember there being a salad that had raspberries, mango, and avocado. We had a surplus of mango last week (hence the sorbet), but I didn't try to make the salad. Instead, I bought some raspberries to make raspberry sorbet, and was also set on making avocado ice cream and making a terrine out of them.

I've made the terrine. I just haven't unmolded or tried it yet, though I have had each component.


I was searching for an avocado ice cream when an old issue of Martha Stewart Living came in the mail. I flipped through it and saw avocados in one of the sections. I was thinking, maybe they'd have a recipe, and a few pages later, there it was in print. None of the ice cream books I had checked out from the library had contained a recipe (though I finally found The Perfect Scoop and it does) for Avocado Ice Cream, and the one I'd found on the Food Network website seemed to complicated. With the magazine, I now had all the components to make my terrine a reality.

The raspberry sorbet though, was by far the tastiest part. Or at least when eaten separately. It's super rich and as creamy as a sorbet could possible be.


Raspberry Sorbet

adapted from recipe for raspberry and kaffir lime sorbet in Ice Cream! by Pippa Cuthbert & Lindsay Cameron Wilson

2 cups raspberries
3/4 cup sugar
300 mL of water (approx 1 1/4 cups, sorry for changing units)
juice from 1 lime

Combine all ingredients in a pot and bring to a boil. Turn heat down and simmer for about 5 minutes, stirring. Remove from heat and cool for about 10 minutes. Process or blend to puree the mixture, and strain through a sieve into a bowl to remove seeds. Refrigerate until cooled. Once chilled, freeze according to ice cream maker's instructions.

Thursday, July 05, 2007

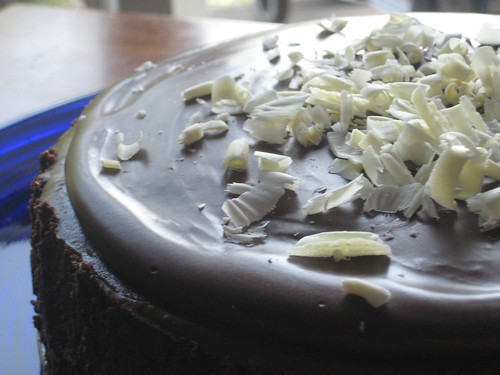
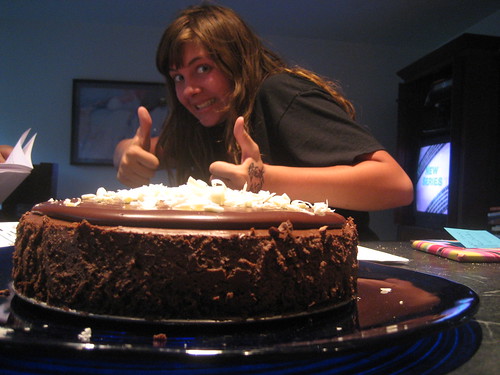
Cheesy Birthday Cake (or more fondly known as TripleChocolate Cheesecake)


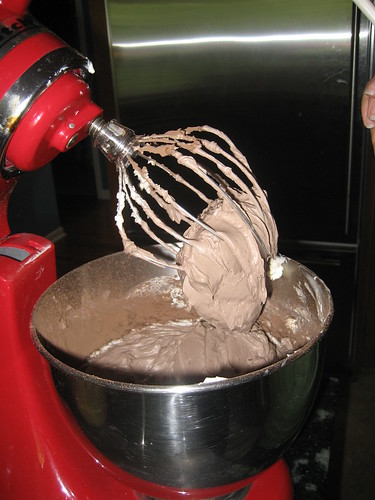
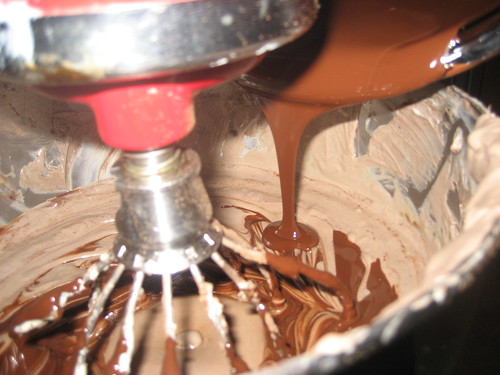
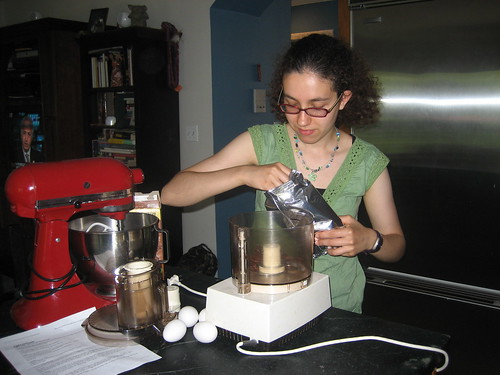
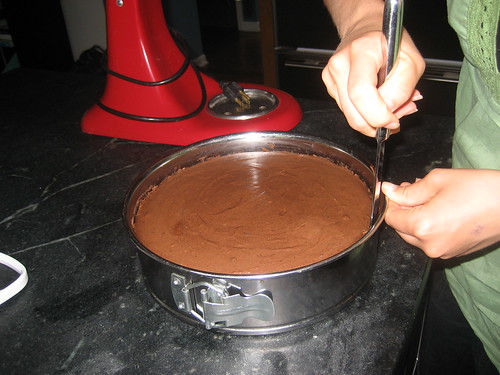
Last month, my friend turned sixteen. When I asked her what she wanted for her birthday, she replied with a modest, "nothing." I remembered her saying the cover of a cookbook looked good, and it was a chocolate cheesecake. I decided that a great gift would be to make her a decadent chocolate cheesecake for her birthday. She had plans with her friends on her birthday, which gave me an opportunity to go to her house and make the cheesecake there, since her mom was fine with my plan. Her brother (who makes some interesting things) was at a friend's house, but the day after her birthday when I went to put the ganache on top and give it to her, I had Nick's assistance.


I wasn't how sure how it would turn out. Up until then, I'd never made a cheesecake. Though I think I've seen a few on Food Network, I don't know enough about cheesecakes to tell whether they are ready or not. Fortunately, I armed myself with a highly rated recipe from Epicurious, the ingredients, a springform pan (that turned out to be too large, according to Michelle, so I used hers instead), and was met with wonderful guidance and tips from Michelle.


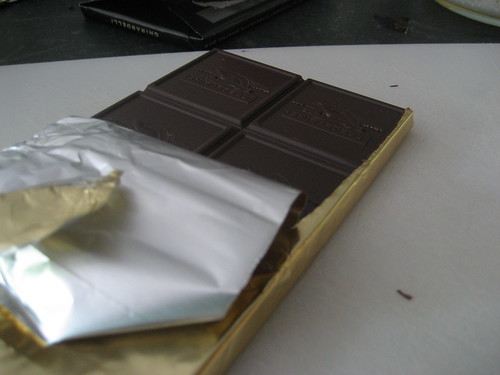
Since the cheesecake was extremely straight-forward and simple, I had some decisions to make and a few things I didn't want to but chose to anyways. I used Ghirardelli Chocolate (which worked fine, but the cheesecake might be richer or have a different flavor with another chocolate) since that was all the store carried that was 70% cocoa. I'd had summer school that morning and didn't want to carry pounds of chocolate around to melt or weigh me down.


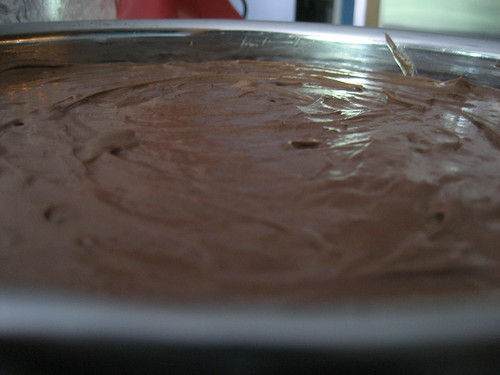
I also had Hershey's Cocoa on hand at home, which turned the cheese purple. It was corrected a bit when I added the melted chocolate, but still disturbed me a bit, despite my love of the color purple.

Additionally, I could not find chocolate wafers and was about to use vanilla ones (which would have ruined it, though I was also considering oreos) when I found my an adorable savior. Hail to the Teddy Graham (now if only they'd remove that partially hydrogenated oil...).
I had no trouble with the kitchen. Michelle was extremely helpful, especially since I was terrified I'd make a mess with the water bath she suggested, so she had to help me so I didn't splash water all over everything.

And I'm fairly confident that Maddy liked it.


Unfortunately, an frightening occurrence also happened that day in her family, so her parents had to leave. However, that is getting better. Her mom recently uploaded the pictures that she took while I was making the cheesecake. She figured I would want to blog the cheesecake. (Thank you!) I do.
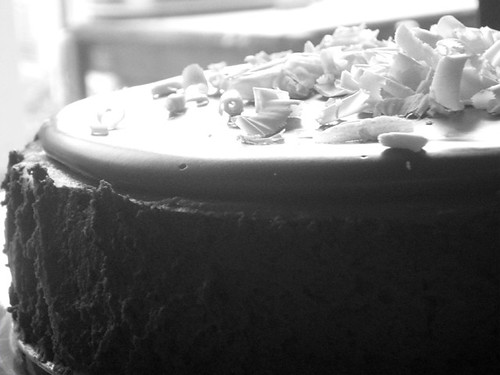

Triple Chocolate Cheesecake
adapted from Epicurious
Note: I do not recommend using Hershey's cocoa powder. The batter didn't stay purple, but I still didn't like how it was purple for that point in time.
Also, this takes quite a bit of time (needs about 3 hours on first day and 4 hours on second day, plus the night in between) but most of it is spent in the oven, chilling, or coming to room temperature to make it tastier.


Crust:
120 chocolate animal graham crackers (such as Teddy Grahams), about 2/3 of a 12 oz. box
1 Tablespoon sugar
6 Tablespoons (3/4 stick) butter, melted

Filling:
10 ounces bittersweet (70% cocoa) chocolate
32 ounces (4 8-oz packages) cream cheese, room temperature
1 1/4 cups plus 2 Tablespoons sugar
1/4 cup unsweetened cocoa powder
4 large eggs, room temperature

Topping:
3/4 cup whipping cream
6 ounces bittersweet (70% cocoa) chocolate
1 tablespoon sugar

white chocolate, to garnish

To make crust:
Preheat oven to 350F. Butter 9-inch-diameter springform pan with 3-inch high sides. Blend cookies in a food processor until finely ground; blend in sugar; blend in melted butter and process until it is well blended and is coming together. Press crumbs evenly onto bottom of prepared pan. Bake until set, about 5 minutes. Cool; but keep oven on for cheesecake.

For filling:
Melt chocolate in a metal or bowl set over a saucepan of simmering water; stirring until melted and smooth. Remove bowl from over water. Cool until lukewarm but still pourable. Beat (whip?) cream cheese, sugar, and cocoa powder in a stand mixer until smooth. Blend in eggs one at a time. Mix in lukewarm chocolate. Pour filling into springform pan over the crust; smooth top. Prepare a water bath in a pan large enough to hold springform pan and with sides at least two inches high. Place cheesecake in pan and pour water to go halfway up sides. Bake until center is just set and appears dry, about 1 hour. Cool 5 minutes. Run knife around sides of cake to loosen; chill overnight.

The following day, make topping:
Stir cream, 6 ounces chocolate, and sugar in a heavy medium saucepan over low heat until smooth. Cool slightly. Pour over center of cheesecake, spreading to within 1/2 inch of edge. Chill until topping is set, about 1 hour.

Release pan sides. Transfer cheesecake to serving plate. Using a vegetable peeler, make white chocolate curls over the cheesecake. Let stand two hours at room temperature before serving.
Tuesday, July 03, 2007

Ready for Sorbetti?


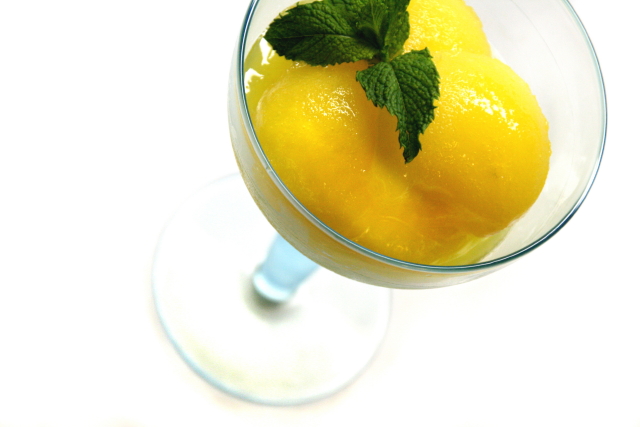
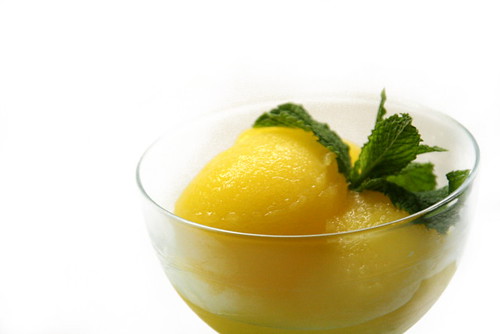
Okay, so it wasn't true sorbetti (whatever that may be), but I did make sorbet.
Dad bought a box of mangoes, so we had nine RIPE mangoes in the house. He used some on Sunday night for dinner, but on Monday I decided I'd try my hand again at frozen treats. I flipped through the books I checked out from the library and found a two recipes for mango ice cream, one for mango sherbet, and one for mango sorbet. I asked Dad which he'd like, and he said sorbet (then sherbet, but I'm not a sherbet fan so I went ahead and made sorbet anyway.)

Since the first thing I'd made in the ice cream maker was a custard based ice cream, sorbet was a breeze. The only hard part was pureeing the mango with the orange juice because I was using too small of a food processor. Dad loved the sorbet, as did the other five people eating it. I'm not sure about the sixth because they took theirs to go.
I think I'll try it again, but see what happens if I make the syrup without corn syrup and omit the liquor, because it lowered the freezing point a bit TOO much. But it was good, so maybe no changes are in order.


Mango Sorbet

makes two quarts
from The Ice Cream & Frozen Yogurt Cookbook by Mable and Gar Hoffman

3 cups water
2/3 cup sugar
2/3 cup light corn syrup
2 large ripe mangoes
1 cup no-pulp orange juice
1/4 cup orange liqueur (such as Triple Sec)

In a medium saucepan combine water, sugar, corn syrup; stir until sugar dissolves. Set aside to cool.
Cut up mangoes and remove peel and puree in a food processor with the orange juice. Stir the mango puree into the cooled syrup. Stir in liqueur and freeze in ice cream maker according to manufacturer's directions

Saturday, June 30, 2007

The Last Friday in June

Friday nights usually mean dinner with my great uncle and aunt. Now that my grandparents are in town, our recent dining expeditions to hit the best new restaurants, as named by a magazine, are on hold. Instead it means we're back to good ol' home cooking.
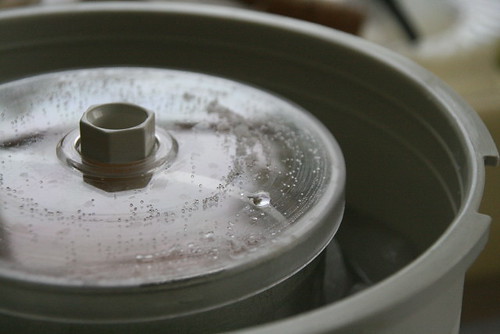
Yesterday I was finally able to try a batch of ice cream, since on my birthday, which my mom was going to get me an ice cream maker for, she found the old one hidden behind a cappuccino machine and some silver trays. I checked out some books from the library, and tried my hand at a hazelnut gelato. Not the easiest thing to make, but I figured, if I was going to use an ice cream maker, why not make something that is worth the effort (it was either going to be that or what sounded like it would be like eating a dark chocolate bar- but in ice cream form). Uncle Larry voted for hazelnut when I saw him yesterday for lunch, so hazelnut it was. The gelato started with hazelnut milk (whole milk that was steeped in toasted, skinned hazelnuts, pureed, and strained through cheesecloth) that was then mixed with cream, egg yolks, sugar, vanilla extract, and salt to make the custard base for the gelato. After cooling overnight in the fridge, it met the ice cream maker tonight right as we sat down for dinner. It may have been able to spend a bit longer in the ice cream maker, but I thought it was done and took it out. It was just soft at the top from all the salt falling to the bottom of the canister. Mom's considering getting one of the gel ice cream makers, but I'm not sure if it would work any better, it would just be easier since it wouldn't require ice or salt to use, though it would require thinking hours ahead (though that is sort of required anyways with a custard base to chill it thoroughly.) Unfortunately, my pictures turned out blurry, but everyone said they liked the gelato, which dad topped with some dark chocolate shavings. I kind of was regretting choosing hazelnut because it doesn't pair well with fruit (at least not in my mind), because I automatically am programmed to associate it with chocolate. I blame nutella for that. The next ice cream I make (or gelato, or maybe even a sorbet or sherbet) will be something more summery to take advantage of the abundance of fresh fruit around. Ice cream really is not all that difficult to make. It just isn't something to do on a whim.


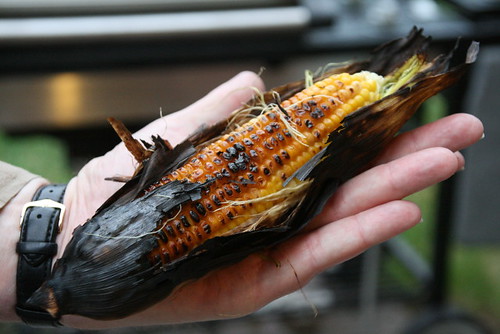
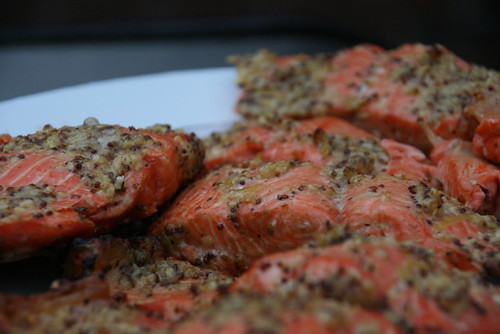
But I had no energy to figure out dinner that would appeal to everyone. Actually, I knew what I wanted to make, but it was spicy and my grandmother doesn't like spicy food. So instead, the salmon recieved a garlic rub and the corn was just grilled by itself. Mom suggested a cucumber-tomato salad, so she made that to go along with it, and the dressing was equal parts yogurt and and spicy salsa. We also had the leftover bean salad.

I look forward to Friday nights, though next Friday I know I'll be doing something else. Maybe I'll go to the Art Institute, since Friday nights are FREE!

Thursday, June 28, 2007

The Overnight Salad


The weather took a turn and now sitting outside is pleasant, almost springlike. As was my lunch. I realize it is almost July and I should be getting red for meals of red, white, and blue. Luscious raspberries, blackberries, blueberries, macerated atop a slice of angel food cake with a heaping dollop of freshly whipped cream.

Sorry, I'm getting a bit ahead of myself. As well as not considering the limited possibility of that scenario occuring (my father's birthday cake) since I've been branching out and making him different things (last year it was a freeform plum tart). I won't say what I have planned for this year (though it will require some new pans) for fear he may actually read this.

But back to the weather. I'm sitting outside right now, so I can say with certainty, that in my backyard, the weather is enjoyable. And perfect. Bright but not sunny, cool but not cold, warm but not hot with an indifferent breeze. Not a stale breeze like those last week, but a slighly cool, almost indifferent one.

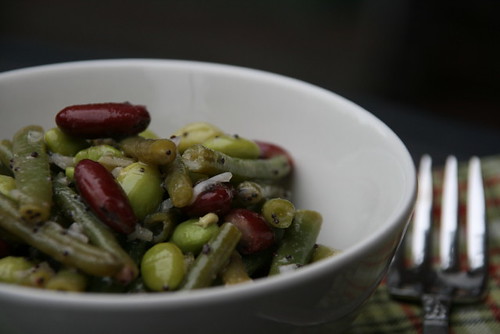
So it really does feel like spring is in the air. And the salad I ate at lunchtime, felt like late spring too, with green beans and a light acidic dressing. Though I'm ashamed to say, I ate it inside while reading the movie review for Ratatouille. I made the salad Wednesday night after dinner so that we could have it on Thursday before whatever we were going to have for dinner. I forgot that my parents would be gone, so there were just three of us and a nice large mixed-bean salad. I didn't realize how acidic it was going to be, but I liked it still, after I got over the slight shock. Part of it depended on if the bean had been actually sitting in the dressing, or was drier from the top since the salad marinated overnight. It was super simple to make and reminded me a bit of LMGs Just Grab It salads (at a Sunflower Market near you... if there is one).
Mixed Bean Salad with Poppy Seed Dressing
serves 8
from Vegetarian Times May/June 2007 p36 by Patsy Jamieson

2 cups frozen shelled edamame beans (10-ounce package, but I can never find that size)
12 oz green beans, trimmed and cut in half crosswise (3 cups)
1/3 cup apple cider vinegar
2 medium shallots, finely chopped (about 1/4 cup)
1 Tablespoon poppy seeds
1 Tablespoon Dijon mustard
1 Tablespoon honey
1/4 cup vegetable oil
salt and pepper, to taste
1 15-oz can red kidney beans, drained and rinsed


Bring a large pot of water to a boil. Add edamame and return to a boil. Add green beans and cook for about 6 minutes or until edamame is tender and green beans are crisp tender. Drain and rinse with with cool water.

In a large bowl, whisk together vinegar, shallots, poppy seeds, mustard, and honey. Gradually whisk in oil. Season with salt and pepper.

Stir in edamame, green beans, and kidney beans. Refrigerate overnight or up to two days, though beans will start to discolor after a day.